This guide assumes you have a functioning Active Directory domain already setup.
First lets have a look at the environment:
FortiGate - 10.12.92.254
DC01 - 10.12.92.252
Domain name: avidpontoon.co.uk
Domain Controller Configuration
The initial configuration we will complete on the Domain Controller. We need to setup a service account for the FortiGate to connect to the domain with:
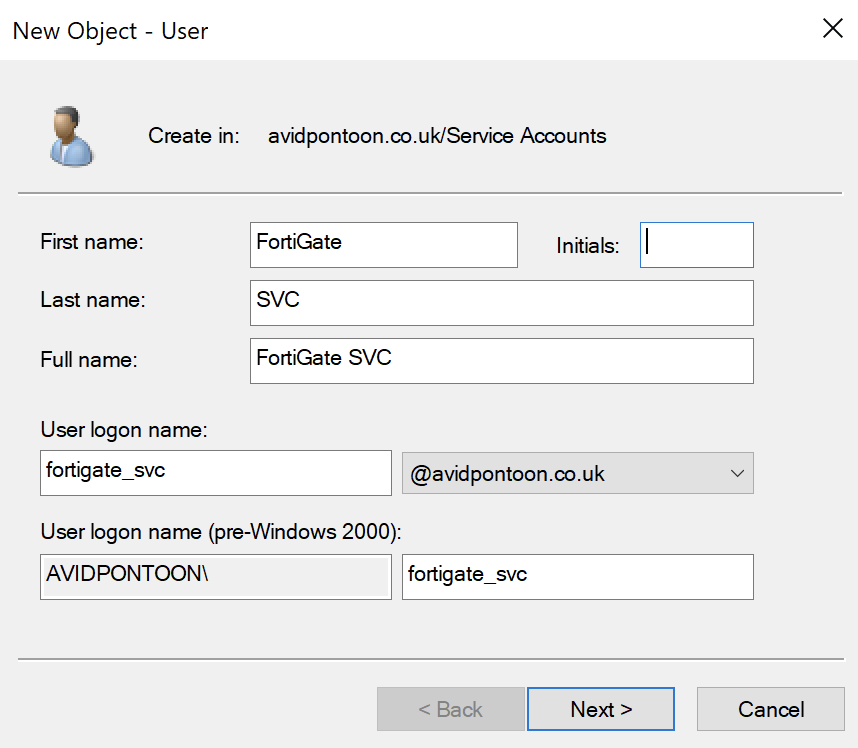
This user only needs Domain User credentials to be able to read the LDAP information from the Server.
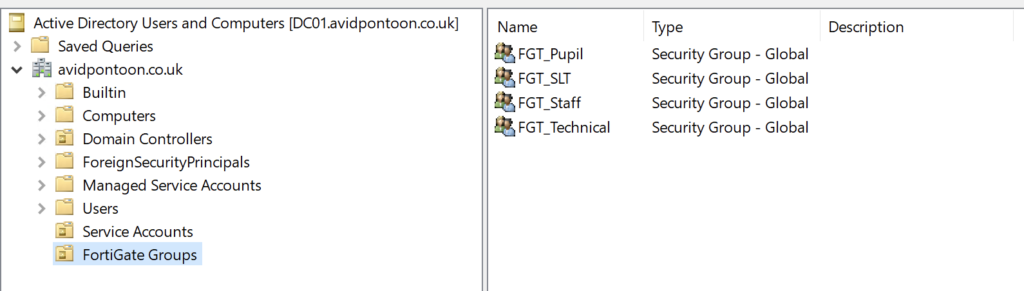
While we are on the Domain Controller, we should create the filtering groups we are going to use later on
I have put these within a separate OU:
While we are on the domain controller, we should take this time to ensure there is a DNS A Record pointing at the Firewall.
In my case:
Server:  dc01.avidpontoon.co.uk
Address:  ::1

Name:    fw01.avidpontoon.co.uk
Address:  10.12.92.254
For the Kerberos authentication to work, we need to generate a Keytab on the Domain Controller so this can be transferred to the FortiGate later on.
To do this, enter the below command within in administrative Command Prompt:
ktpass -princ HTTP/FW01.AVIDPONTOON.CO.UK@AVIDPONTOON.CO.UK -mapuser AVIDPONTOON\fortigate_svc -pass Password_Here -crypto all -ptype KRB5_NT_PRINCIPAL -out fw01.keytabYou need to make sure you replace the items in bold italics with information from your environment.
Once the keytab has been generated, we need to base64 encode it:
certutil -encode fw01.keytab tmp.b64 && findstr /v /c:- tmp.b64 > fw01.keytab.txtThis will leave you with a file containing a long base64 string in the text file.
FortiGate Configuration
Now, we need to configure the FortiGate to talk with the Domain Controller and Client Machines.
From the FortiGate dashboard, navigate to 'LDAP Servers' under 'User & Authentication'. There will likely be no LDAP Servers configured, click 'Create new' to add one.
Once you have entered all the information, click the 'Test Connectivity' button. You should see the 'Successful' icon appear if this worked:
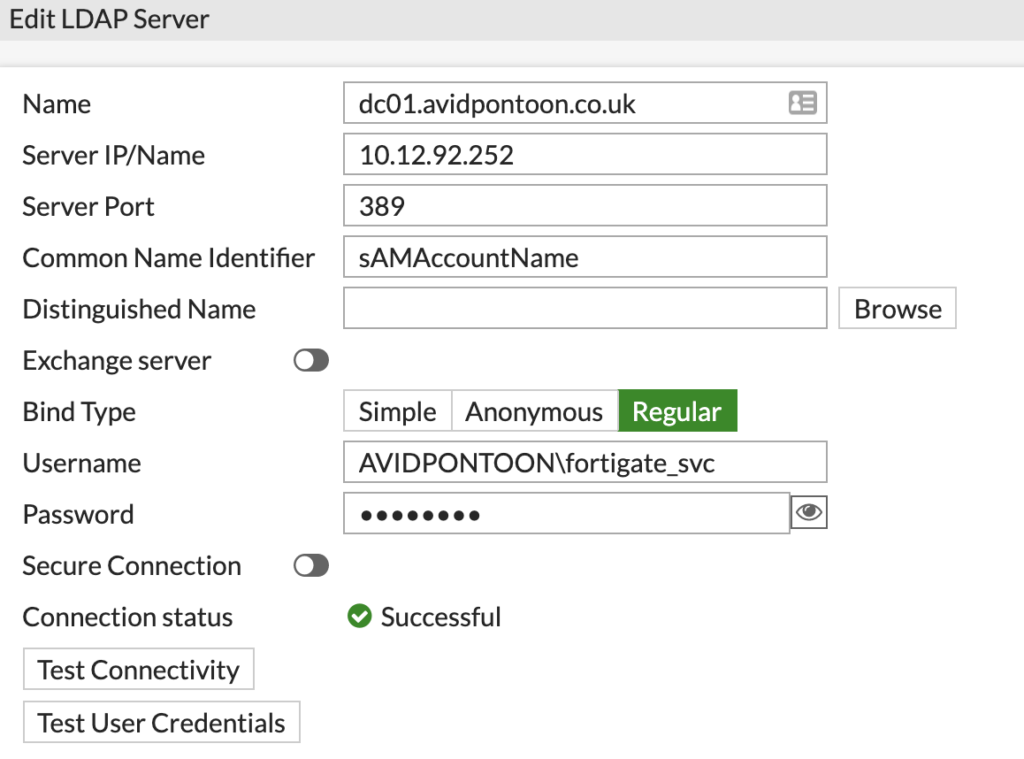
Note: Make sure you put the domain with a backslash before the username or authentication will fail.
Once the connection status shows as Successful, click Browse next to the Distinguished Name and pick the root of the domain:
Click OK once selected.
You should then be able to click OK again to add the LDAP Server to the FortiGate.
You will see it listed under LDAP Servers:

Now, we need to create the groups from the LDAP Sever. Navigate to 'User Groups' under 'User & Authentication'.
To add a new group, click 'Create New'.
Set a name for the Group and make sure the type is set to 'Firewall':
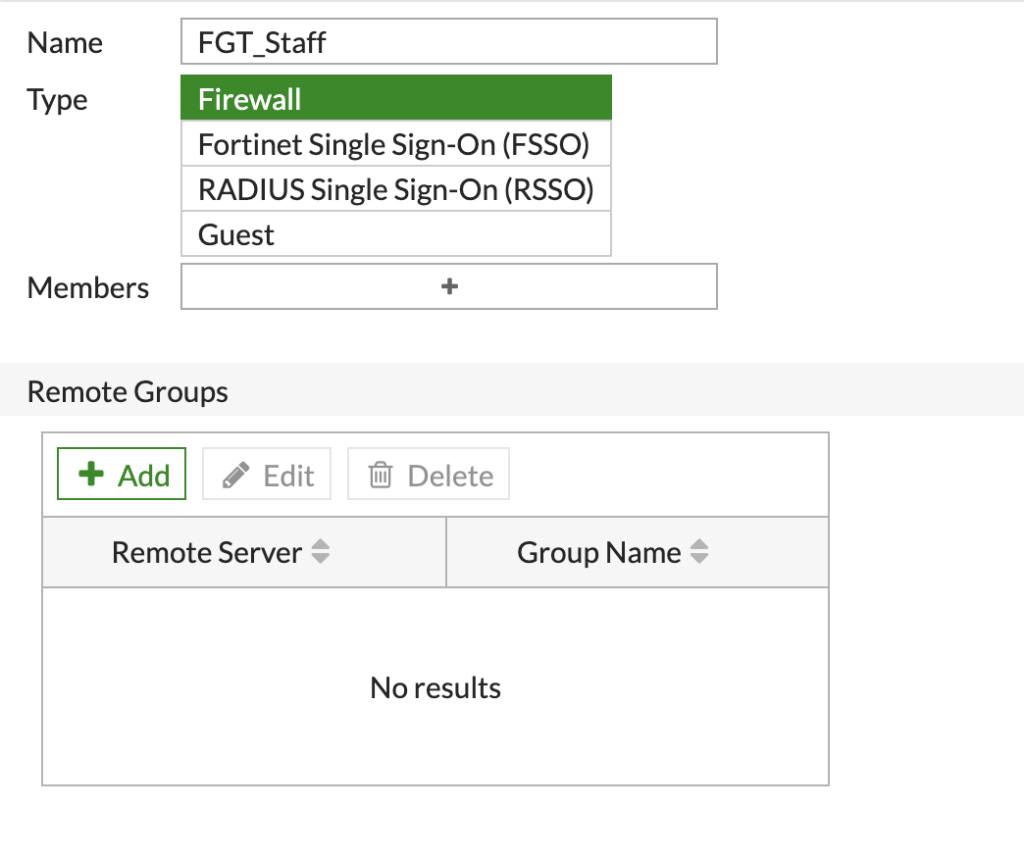
Under 'Remote Groups', click the 'Add' button. You will be presented with a side pane, select the LDAP server we configured earlier and the domain tree will appear:
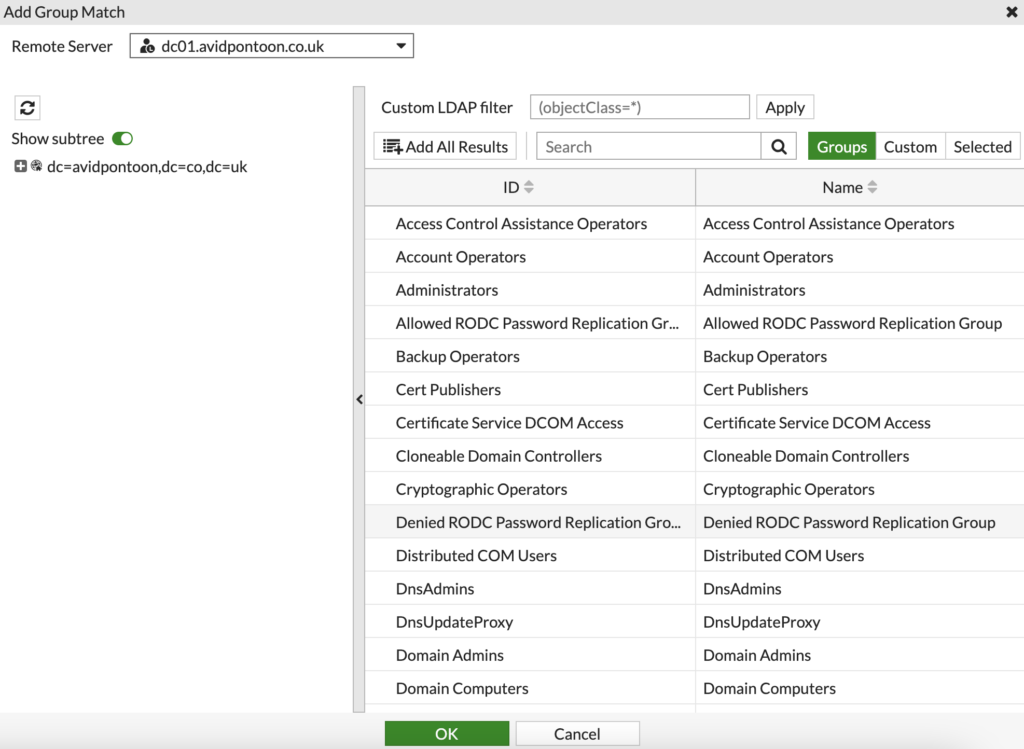
You should use the search at the top to find the Active Directory group that matches the group you are creating. For example, I would search for the 'FGT_Staff' group.
When you have found the group, right click on it and select 'Add Selected' to add the group. Click 'OK' to proceed.
You should now see the group in the 'Remote Groups' section:
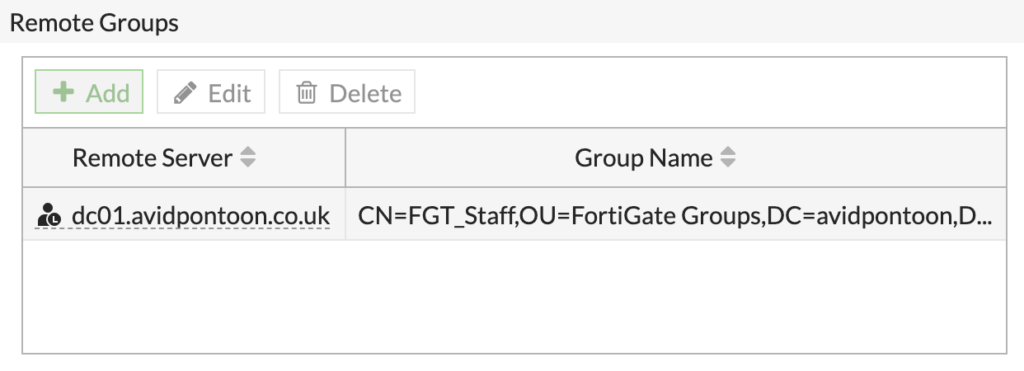
To finish adding the group, click 'OK'.
You should repeat this process for all the groups you have configured in Active Directory that you want to match for filtering:

Now, we need to enable the Explicit Proxy within the FortiGate. To do this, select 'Feature Visibility' under 'System'
Under Security Features, ensure that 'Explicit Proxy' is switched on:
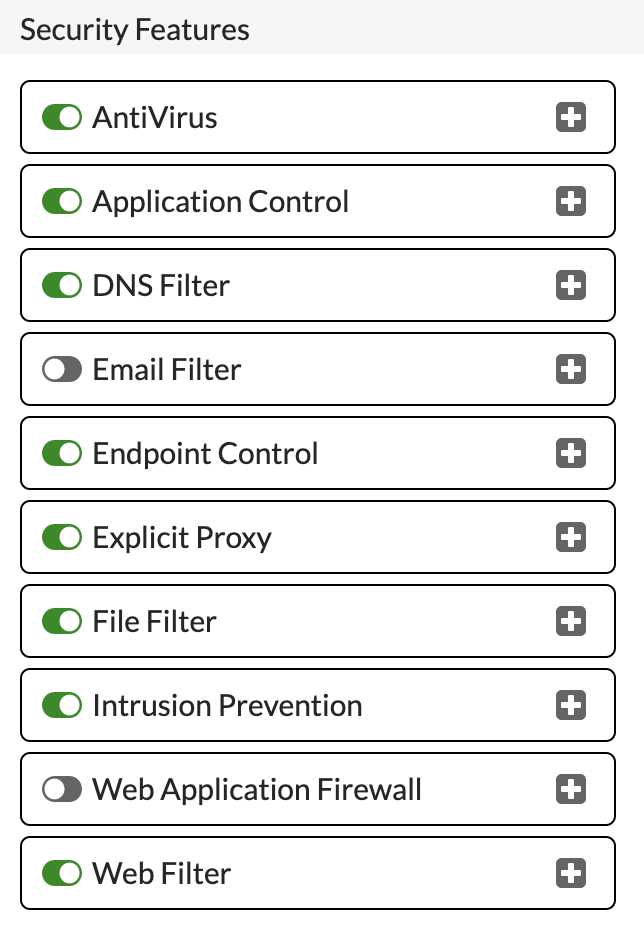
Click 'Apply' to save and enable.
To configure the proxy. Click 'Explicit Proxy' under 'Network'. The proxy is disabled by default and will need enabling:

Now, you need to configure the options below to suit your environment:
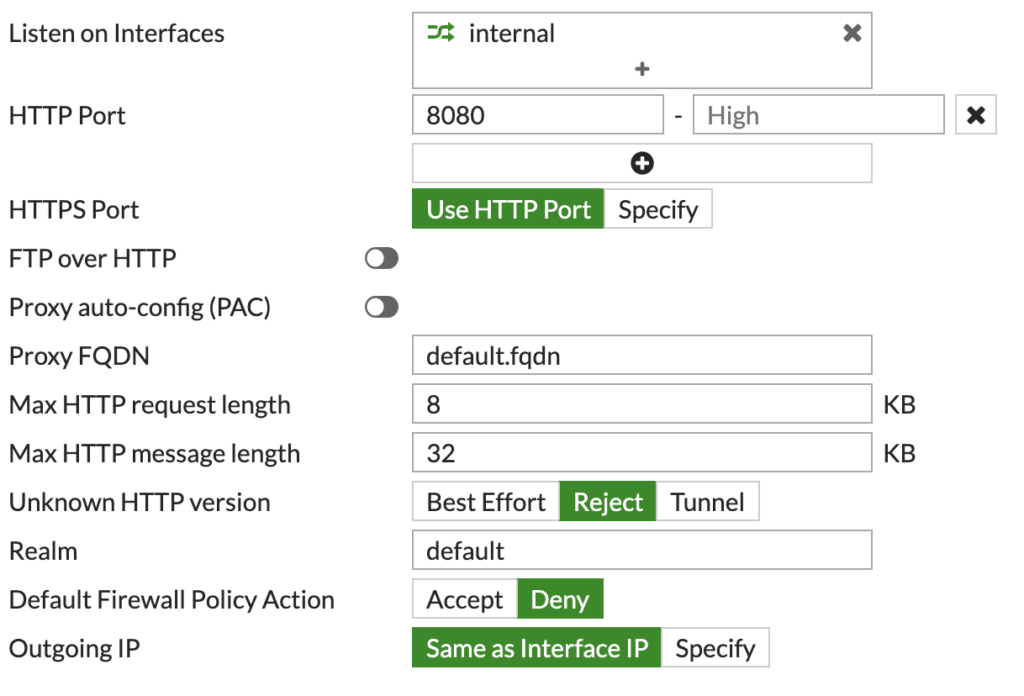
This simple configuration should be good as a base.
Now, we can look to create the Proxy Policies. However, first we need to create the Web Filter Profiles.
Under 'Security Profiles', click 'Web Filter'. We need to create a profile for each of our groups, with the desired categories/URLs.
For example, this is the Profile I will assign to the 'FGT_Staff' Active Directory group:
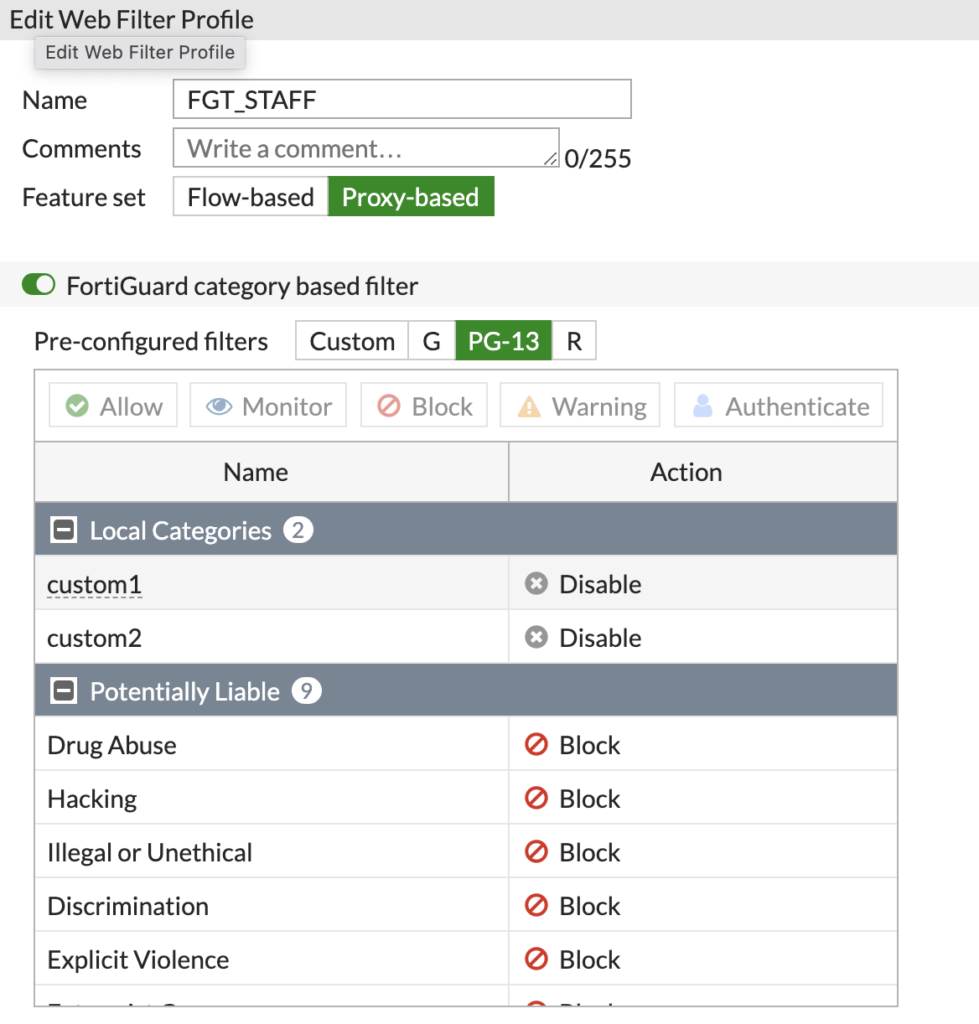
Here I am using the FortiGuard categories, so don't have to manually specify URL's. You also need to make sure the Feature set is on 'Proxy-based'
You should create a Profile for each group, like this:
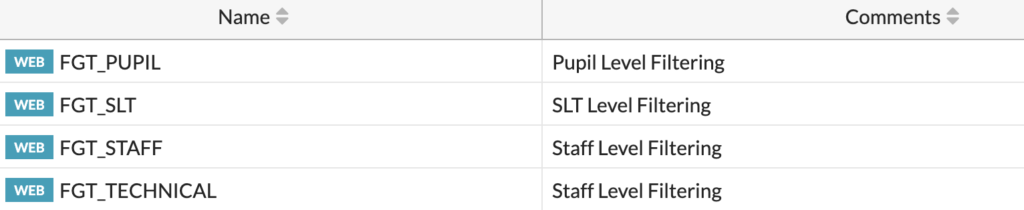
We can then use these Profiles within the Proxy policies.
To create these, click on 'Proxy Policy' under 'Policy & Objects'.
We need to create policies for each of the groups, click 'Create New' to create a policy:

Above is an example of my 'FGT_STAFF_EXPLICIT' policy. This is an Explicit web policy that applies to the 'FGT_Staff' firewall group we created, which matches the 'FGT_Staff' Active Directory group.
You should create a policy for each group, making sure you select the correct Web Filter and SSL Inspection policies based on your requirements:

Now, we need to setup an Authentication Scheme and Rule to make sure the web proxy can challenge for authentication from the devices.
To add these, go to 'Authentication Rules' under 'Policy & Objects'.
First, we need to create an Authentication Scheme. Click 'Create New' and choose Scheme.
Give the scheme a name and select 'Negotiate' as the Method:
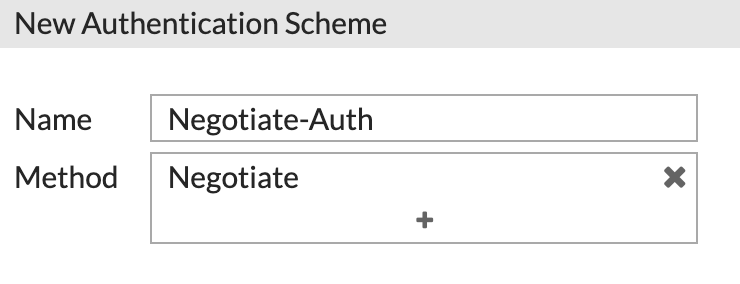
This method will attempt to use Kerberos in the first instance and fall back to NTLM if Kerberos failed.
Now, we need to enable 'Negotiate NTLM' and select a Kerberos Keytab. For you, the list is likely blank. Click 'Create' to add one.
You should fill in the details with the Principal (used in the command to create the Keytab earlier), choose the corresponding LDAP server and paste the text within the Keytab text file we base64 encoded earlier:

Click 'OK' to save once the information has been entered.
Finally, enable the 'Domain controller' option and pick it from the list, you likely won't have one configured. Click 'Create' to add one.
Fill in the information to match your domain controller, and choose the correct LDAP Server:
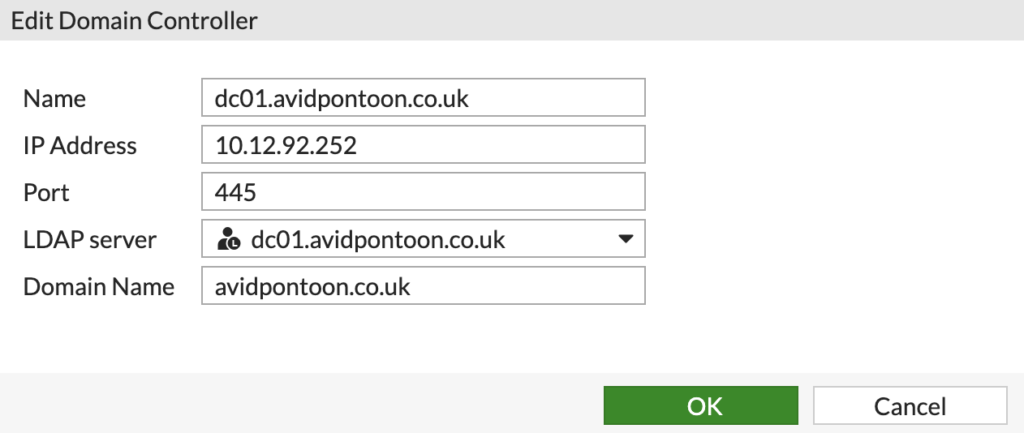
Click 'OK' to save and choose your newly created Domain controller from the list.
The final scheme should look something like this:
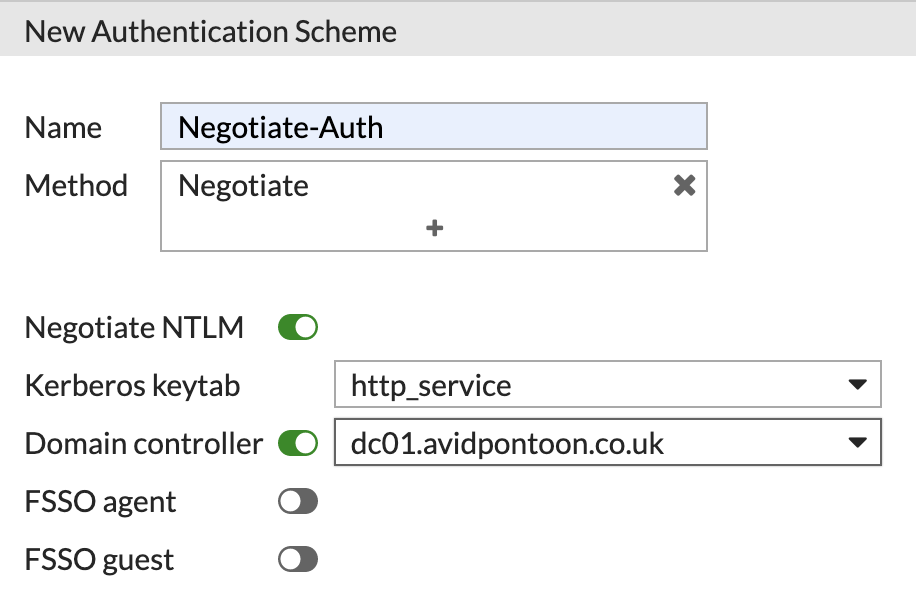
Click 'OK' to save it.
Now we need to create a Rule and use this Scheme. Click 'Create New' and this time choose Rule:
Configure the new Rule, making sure to select that 'IP-based Authentication' is Disabled and the Scheme is selected:
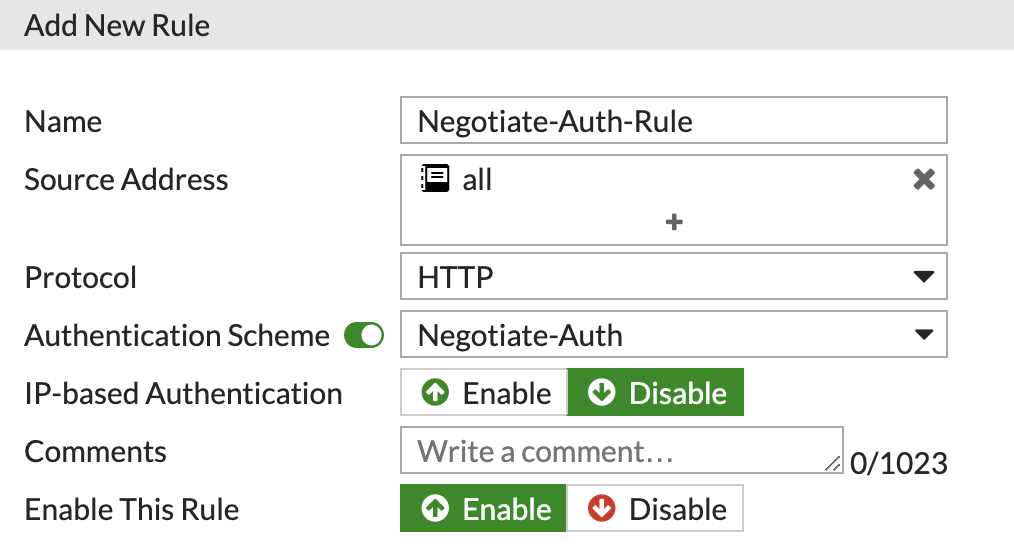
Having IP-based Authentication enabled, creates some strange issues when a user logs off a machine and a new user logs in. This is the recommended configuration from Fortinet.
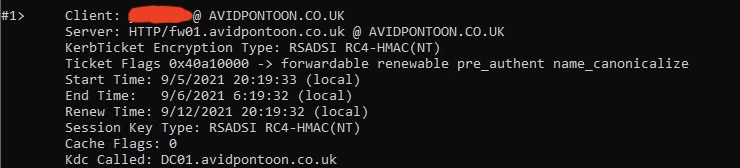
After configuring the proxy on a Domain Joined client to 'fw01.avidpontoon.co.uk' and port 8080. You should be able to open Command Prompt and type 'klist' to see the kerberos session:

2 Comments
Lucas · 26th October 2024 at 9:33 pm
Hello,
great article.
I have one question, what do I gain having this kerberos auth? I mean if I do not configure this part (but I configure the rest,groups policy,etc) I will still have active authentication for my users with the right security profiles…
Thank you!
Regards
Nick Carlton · 9th November 2024 at 10:59 pm
Hey Lucas, unless you are doing another form of authentication like FSSO, you wouldn’t see any user information or be able to enforce policy based upon users or group membership. In this guide, Kerberos is being used to securely authenticate a user on the domain to the firewall to ensure they get the correct level of access, without the underlying authentication, none of the other aspects would work as intended.
Hope this helps.
Thanks
Nick