In the last section, we configured FSSO and setup the Groups on the FortiGate to interface with the FSSO Groups.
Now, we will Setup the web proxy and policies for the proxy too.
First, we need to enable the Explicit Proxy within the FortiGate. To do this, select 'Feature Visibility' under 'System'
Under Security Features, ensure that 'Explicit Proxy' is switched on:
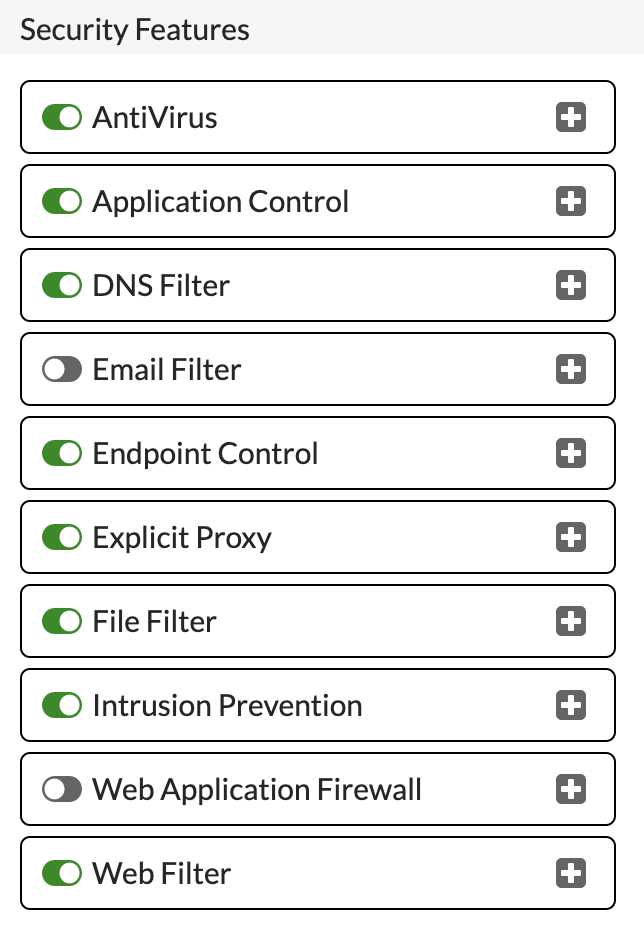
Click 'Apply' to save and enable.
To configure the proxy. Click 'Explicit Proxy' under 'Network'. The proxy is disabled by default and will need enabling:

Now, you need to configure the options below to suit your environment:
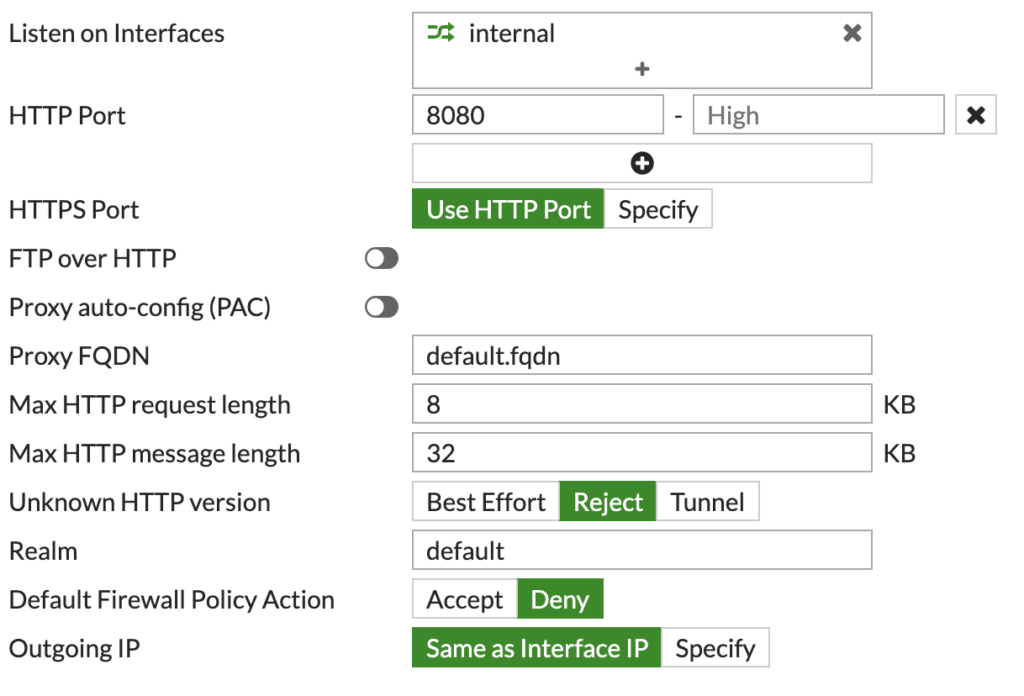
This simple configuration should be good as a base.
Now, we can look to create the Proxy Policies. However, first we need to create the Web Filter Profiles.
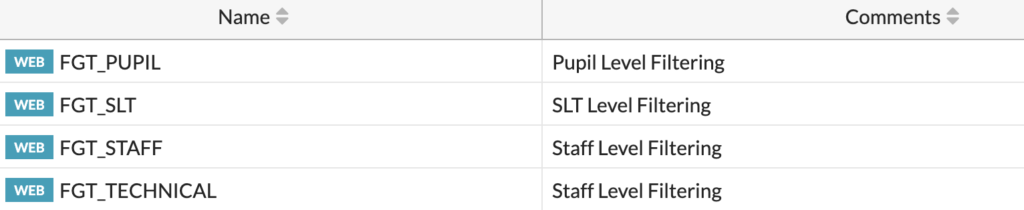
Under 'Security Profiles', click 'Web Filter'. We need to create a profile for each of our groups, with the desired categories/URLs.
For example, this is the Profile I will assign to the 'FGT_Staff' AD group:
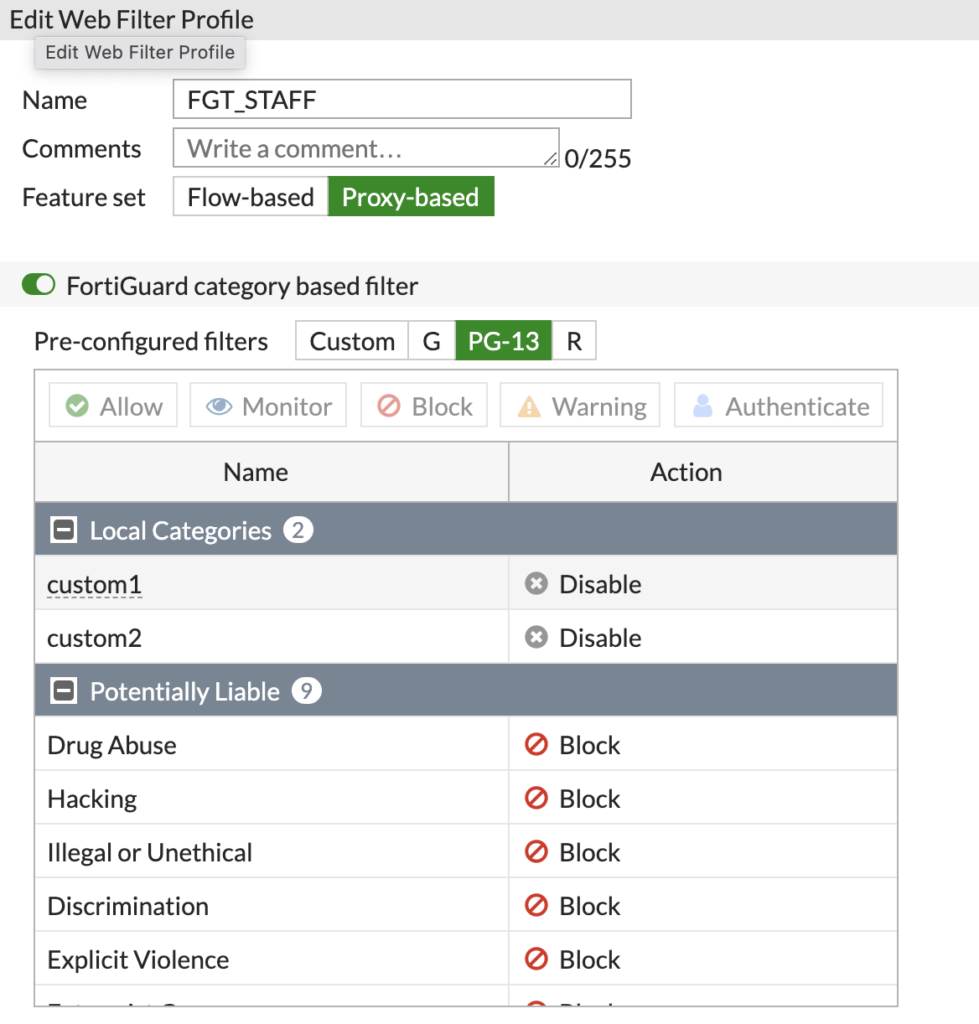
Here I am using the FortiGuard categories, so don't have to specify specific URL's. You also need to make sure the Feature set is on 'Proxy-based'
You should create a Profile for each group, like so:
We can then use these Profiles within the Proxy policies.
To create these, click on 'Proxy Policy' under 'Policy & Objects'.
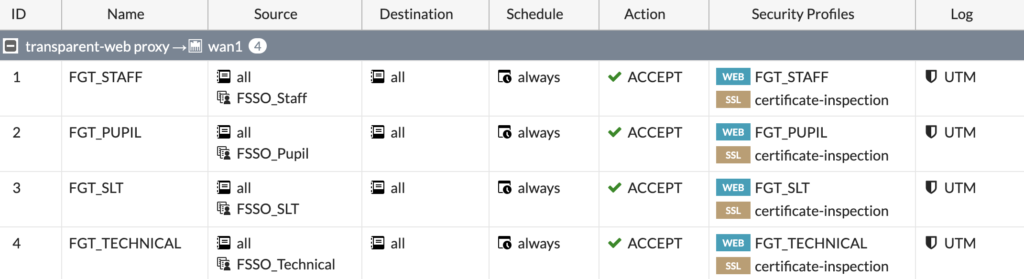
We need to create policies for each of the groups, click 'Create New' to create a policy:
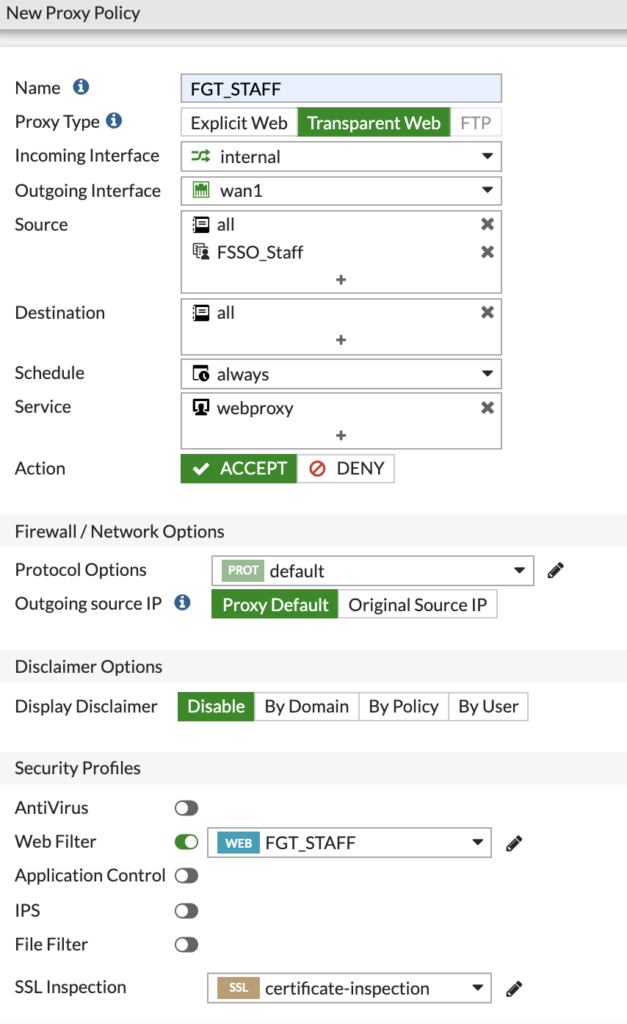
Above is an example if the 'FGT_Staff' policy. This is a transparent web policy that applies to the 'FSSO_Staff' group we created in the previous section.
You should create a policy for each group, making sure you select the correct Web Filter and SSL Inspection policies based on your requirements:
Now, we need to setup some Authentication Rules and Schemes to make sure the web proxy can see the users.
To add these, go to 'Authentication Rules' under 'Policy & Objects'.
First, we need to create an Authentication Scheme. Click 'Create New' and choose Scheme.
Give the scheme a name and select Fortinet Single Sign-On as the Method:
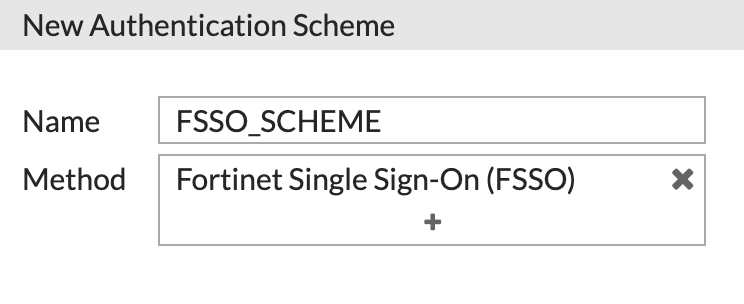
Click OK to save.
Now we need to create a Rule and use this Scheme. Click 'Create New' and this time choose Rule:
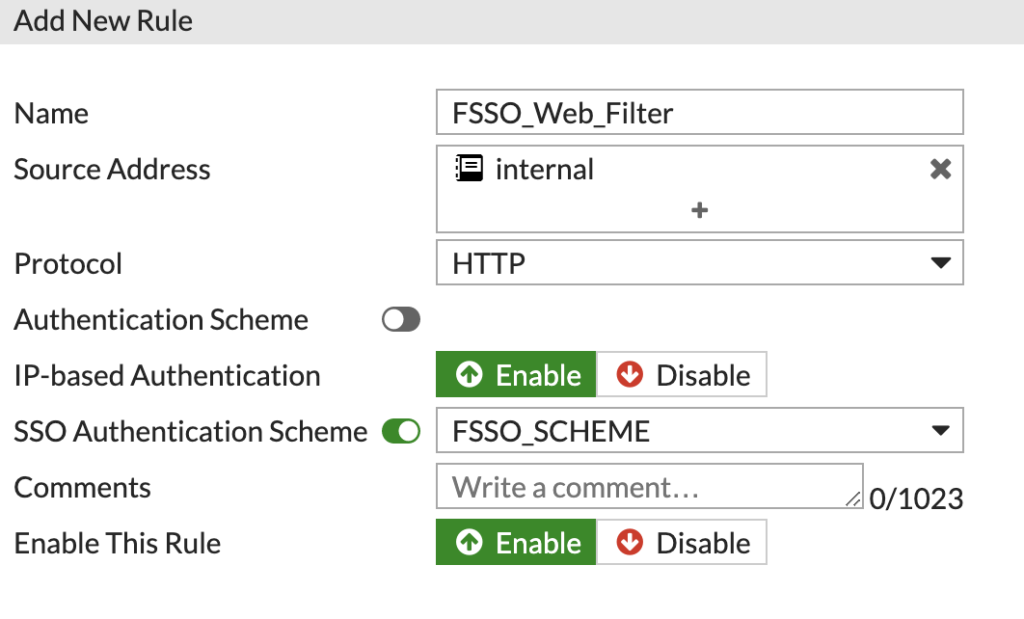
Configure the new Rule, making sure to select the Scheme under the SSO Auth Scheme and not the one above.
Click OK to save the Rule.
Finally, we need to create a rule that pushes the HTTP and HTTPS traffic into the Proxy.
First, we need to enable the advanced features in 'Feature Visibility', this is under 'System':

Ensure 'Policy Advanced Options' is set to On. Click 'Apply' to save the changes.
Now we can go to 'Firewall Policy' under 'Policy & Objects' and create a new rule to catch the web traffic:
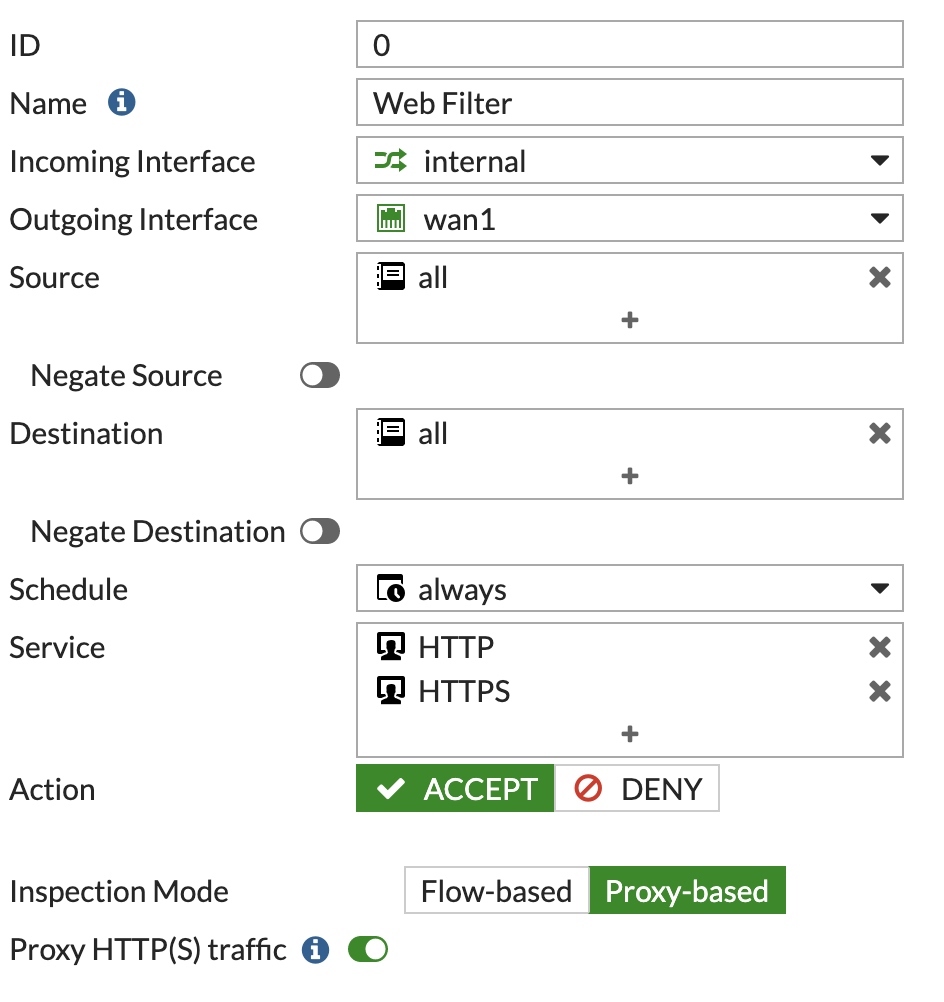
Ensure the 'Inspection Mode' is set to Proxy Based and 'Proxy HTTP(S) traffic' slider is set to ON.
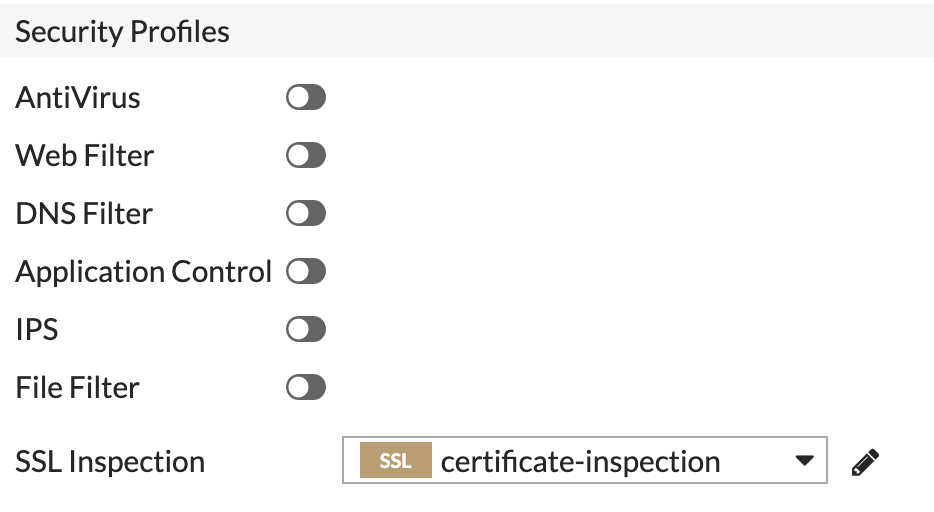
You can then choose the desired level of SSL Inspection below:
You do not need to configure any Web Filter profiles as the proxy handles this with the rules we created.
Click OK to enable the Firewall Policy and you will also need to ensure is it placed in the correct order with other rules you may have. As this needs to be processed before other traffic in most cases.
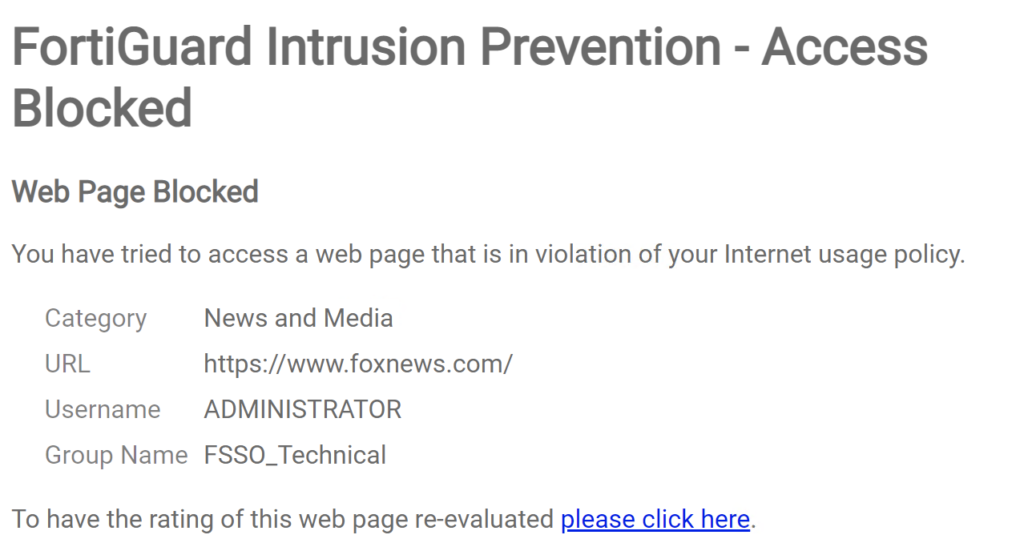
With all the configuration done, we should now be able to test the rules. I will test from the Domain Controller with the Administrator logged in, they are part of the group FGT_Technical in AD.
As you can see, going to a News Site, shows the block page and the details about the user:
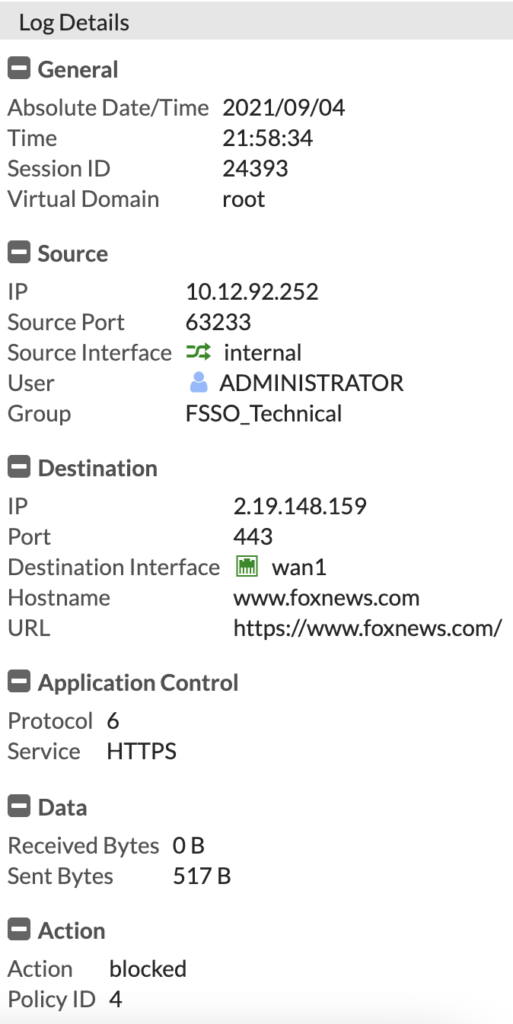
We can also see this is the web filter log:
Logins within the Domain environment will now be captured by the FSSO Collector Agent, passed to the FortiGate and then the FortiGate can transparently filter those users based on their group membership within Active Directory.
You can also configure another policy below all the group ones, as a transparent rule, with a matching Web Filter Profile.

0 Comments