Many companies will have internal servers that need to be accessed outside of the organisation. These could be web servers or mail servers.
Here I will show how to configure a Cisco router to map your internal servers to an external IP provided by your ISP using Network Address Translation (NAT).
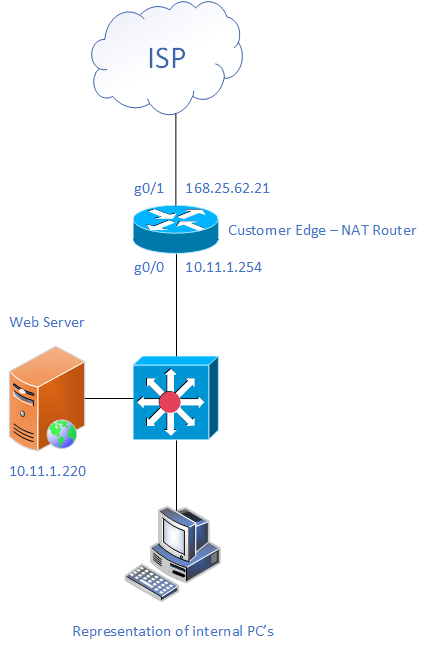
Here is the topology:
Lets say that you want to host your companies website internally with public access. You may already be using your current public IP address to port-forward traffic to another server. You ask your ISP for some more external IP addresses and they give you this prefix: 56.221.255.48/29.
This prefix includes the following addresses:
- 56.221.255.49
- 56.221.255.50
- 56.221.255.51
- 56.221.255.52
- 56.221.255.53
- 56.221.255.54
Now lets get into the config. We can either fully map the public address to the private address or map on specific ports. I will show you how to do both. We will use the public address of 56.221.255.49
Here is the config for the customer edge router:
Cust_Edge(config)# ip nat inside source static 10.11.1.220 56.221.255.49The command above will map on all ports and protocols, this may be what you want but can be insecure.
Cust_Edge(config)# ip nat ins source static tcp 10.11.1.220 80 56.221.255.49 80
Cust_Edge(config)# ip nat ins source static tcp 10.11.1.220 443 56.221.255.49 443
This command maps tcp port 80 (http) and port 443 (https) only. This is more secure and is recommended.
Your ISP will have added a static route in their network that points the /29 to your router. This means you do not have to configure additional interfaces on your router.
That would look something like this:
ip route 56.221.255.48 255.255.255.248 168.25.62.21
0 Comments