Now, the cluster is partially setup. As there is no space to hold any VM's the vSphere Cluster Service VMs cannot be provisioned.
We will complete the configuration on the first host in this guide.
Creating a new vSwitch for iSCSI
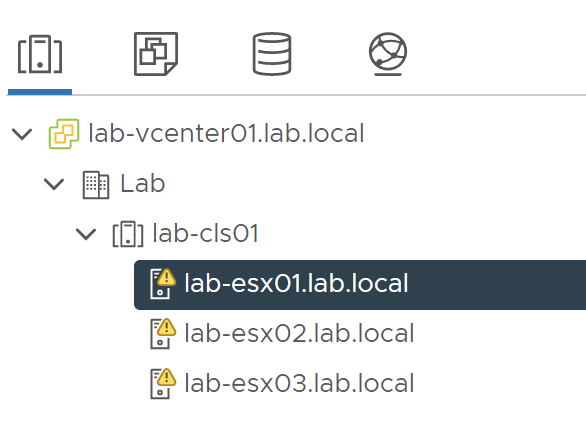
To begin, under the cluster, click on the first host:
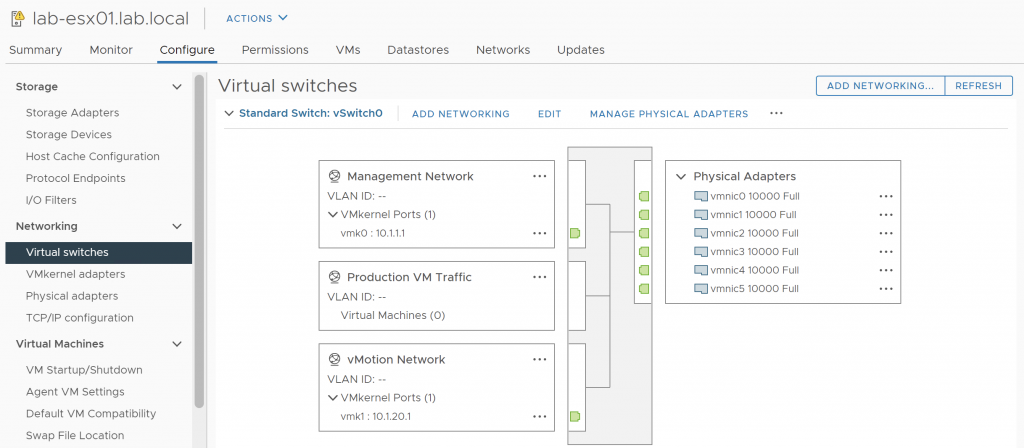
Then move under the Network tab and then down to Virtual switches, you should see the configuration from before:
We want to add new vSwitches for the iSCSI traffic. This helps with fault tolerance.
To to this. Click the Add Networking button, this page should appear:
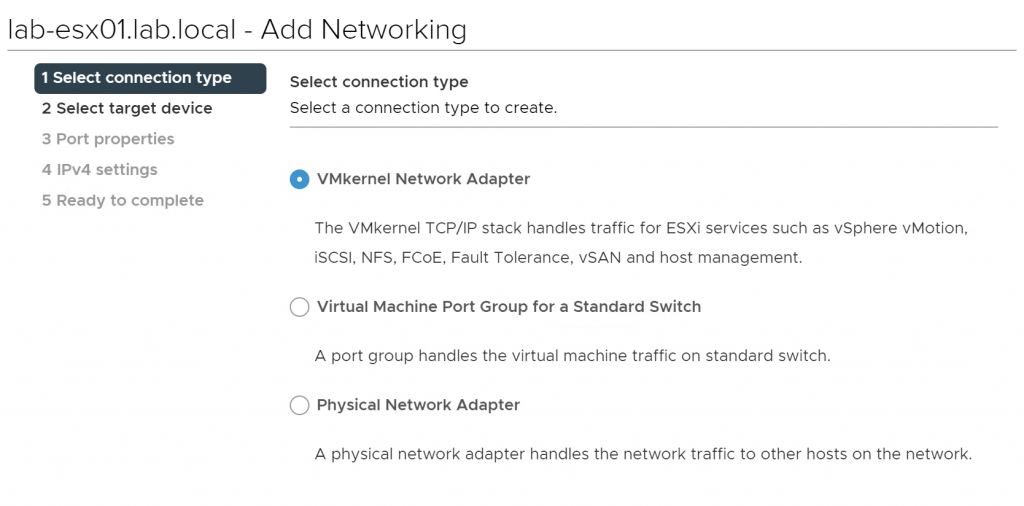
Ensure that VMkernel Network Adapter is selected as the iSCSI adapters will need IP addresses.
Click Next.
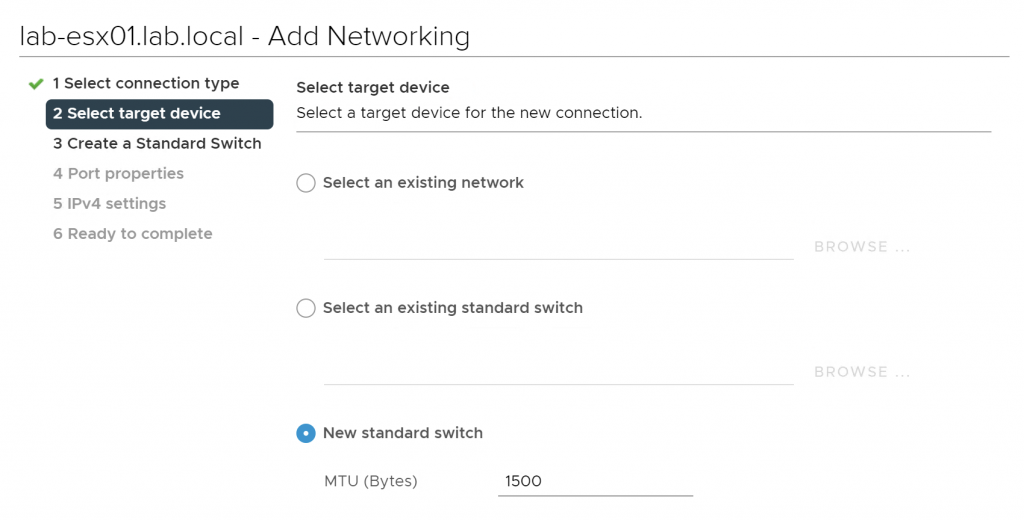
As we aren't using the existing switch, click on 'New standard switch'. As this is iSCSI, you would normally set the MTU to 9000 for jumbo frames, however I am not doing that in this lab, we will leave it al the default and click Next.
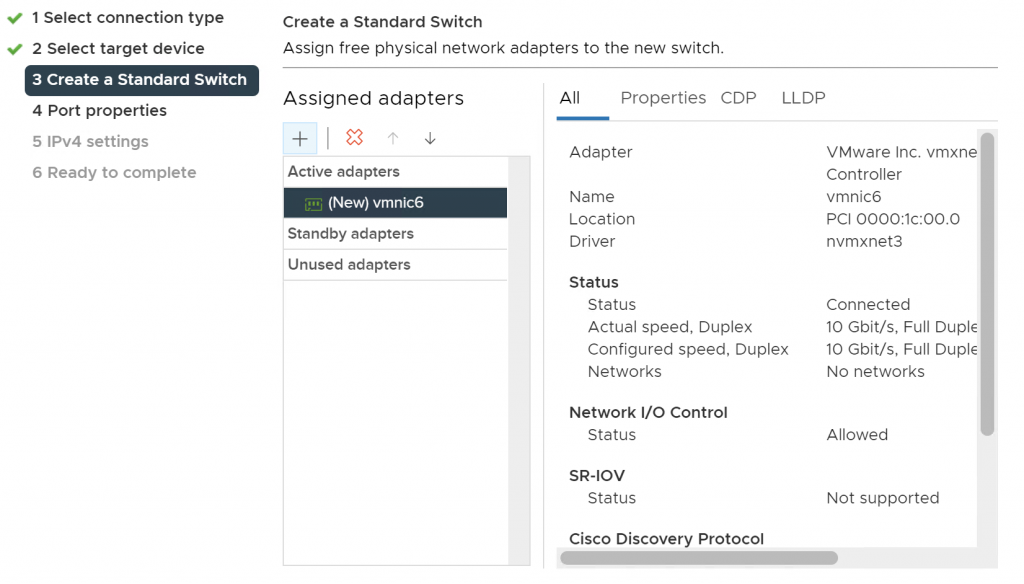
On this page, we need to add physical interfaces to the switch, as this will be iSCSI-A, click the + and add vmnic6 to the active adapters branch (as shown above).
Click Next.
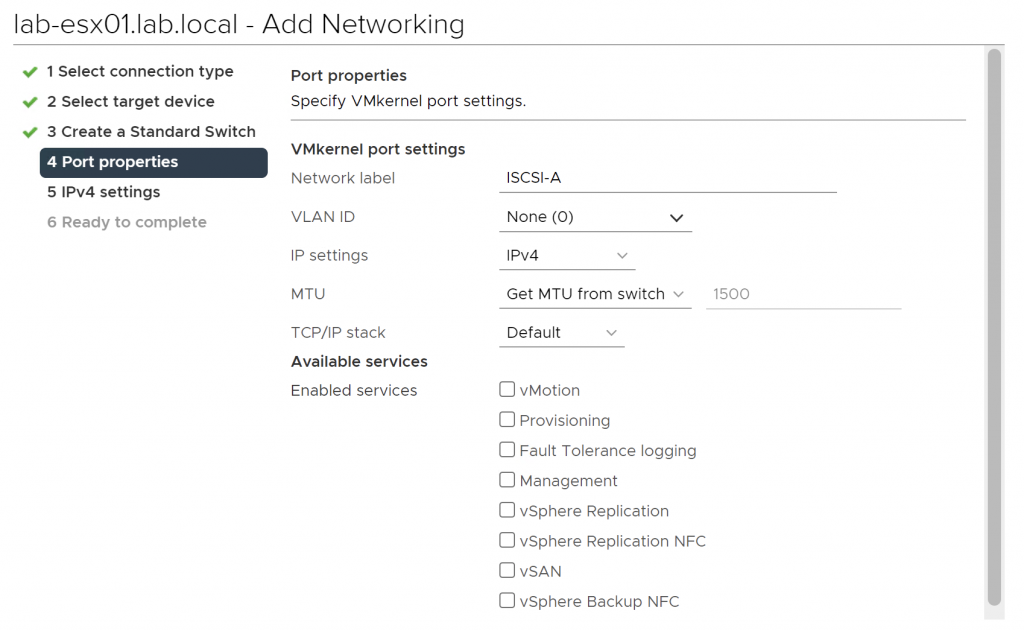
On this page, we configure the port name and services. I have called this port ISCSI-A. iSCSI is enabled by default so no services have to be explicitly enabled (and shouldn't be on this port).
Click Next.
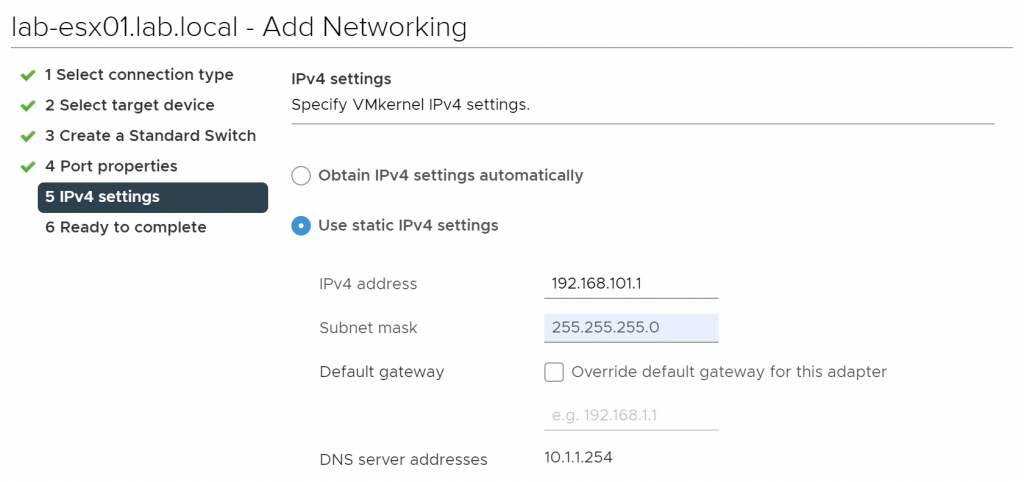
Here we configure the IP address, as this is the first host, I have used the first address on the ISCSI-A range.
Click Next to view the summary.
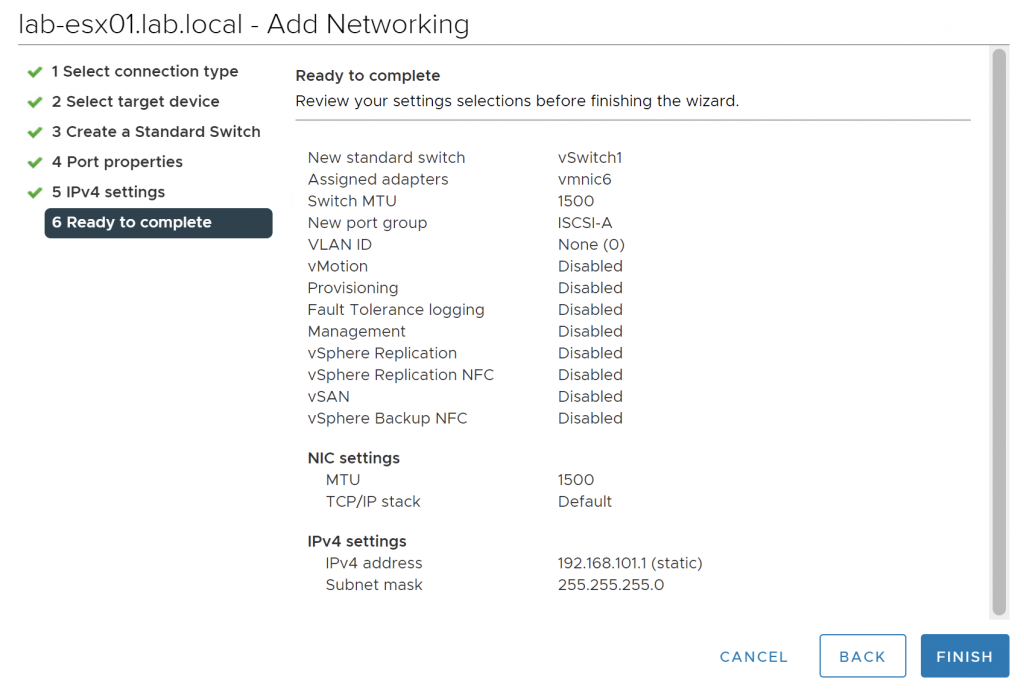
All of this looks correct. Click Finish to add the vSwitch, Port Group and VMkernel NIC.
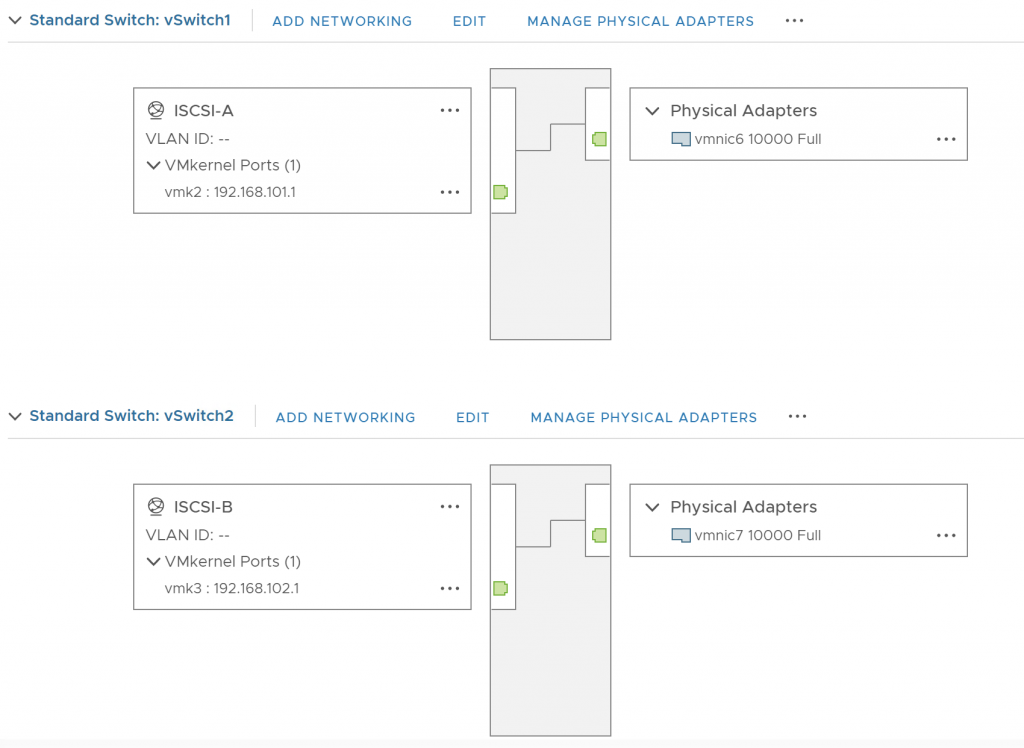
You will see the vSwitch (vSwitch1) appear in the panel:

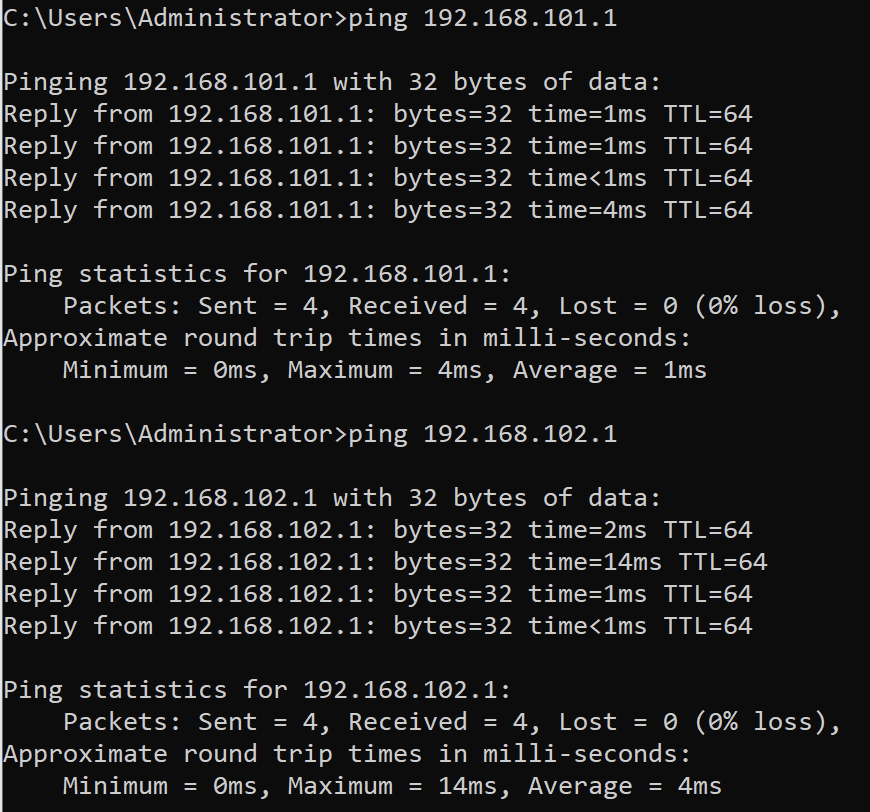
To test this configuration has worked, we will ping 192.169.101.1 from lab-san01 to prove connectivity:

This proves the configuration has worked!
You need to complete the same configuration again but for ISCSI-B. For brevity, I will not show this. The only changes I will make is to add vmnic7 as the physical interface, call the port group ISCSI-B and use 192.168.102.1 as the IP address.
You should end up with two new vSwitches like this:
Again, lets prove connectivity from lab-san01:
This looks good, now we can do the iSCSI configuration on the host.
Configuring the iSCSI Storage Adapter
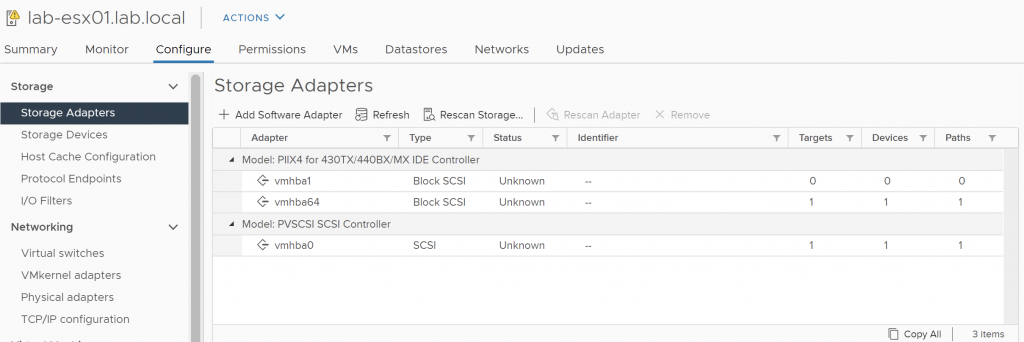
Under the Configure tab, click on 'Storage Adapters':
Click on the 'Add Software Adapter' button on the top panel.
Click 'Add software Adapter' and click OK.
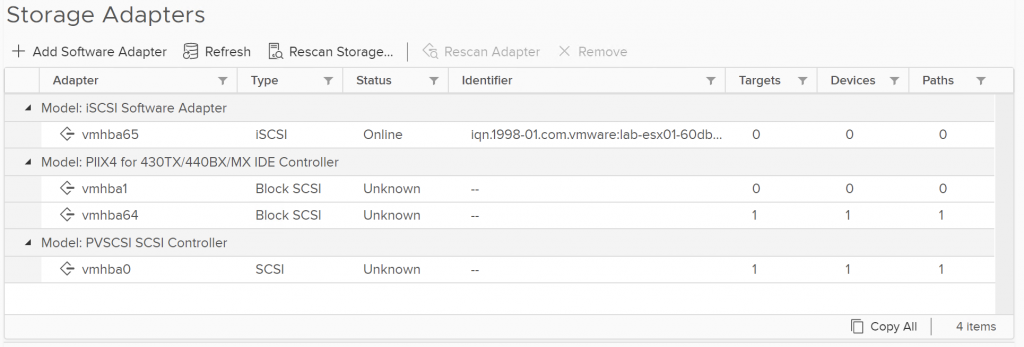
A new storage adapter will appear (vmhba65):
Click on 'vmhba65'. A panel will show below:
Click on the 'Network Port Binding' tab:
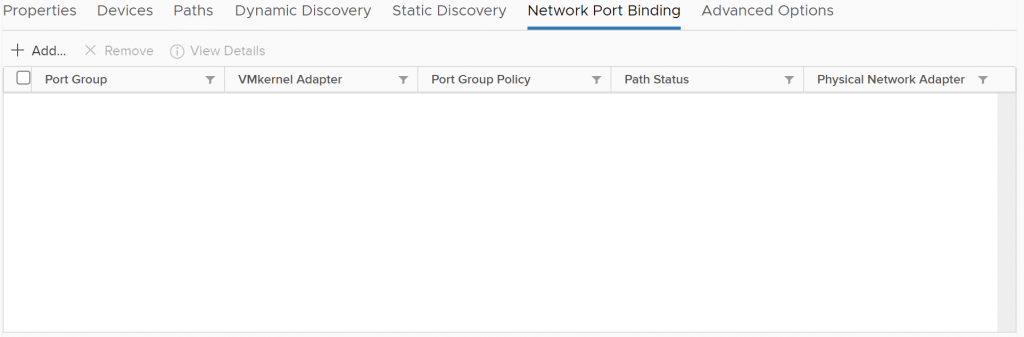
Click on the 'Add' button, this box will appear asking to select interfaces:
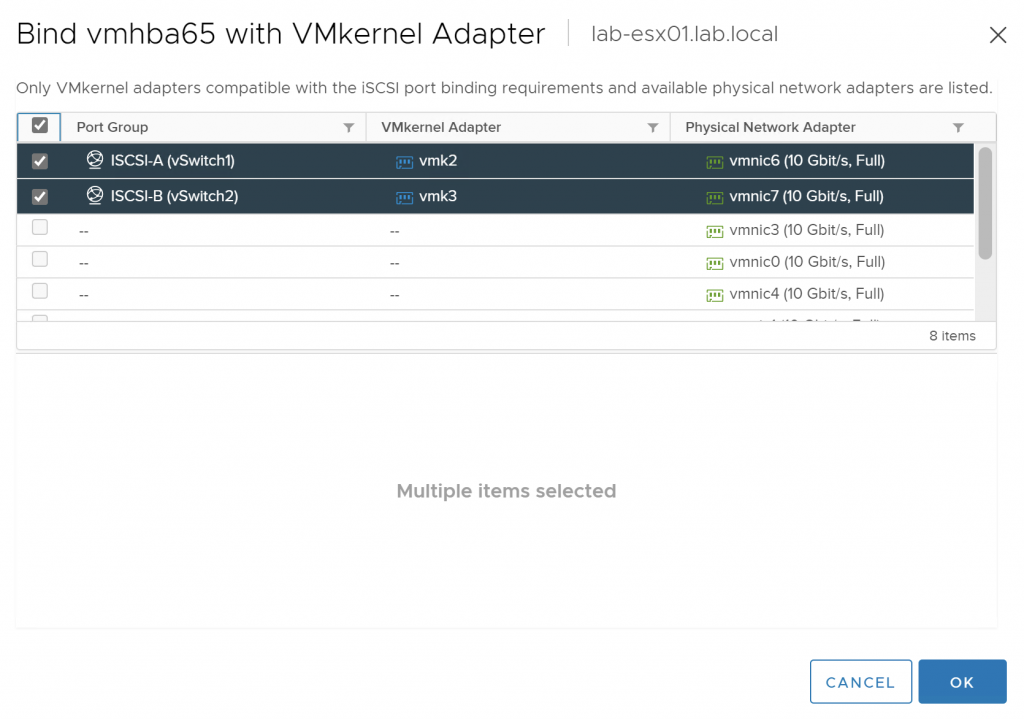
After selecting both ISCSI-A and ISCSI-B adapters, click OK.
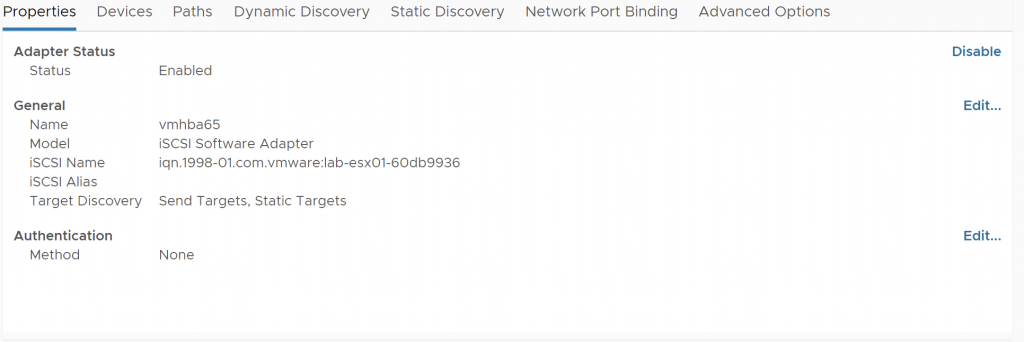
Move to the 'Properties' tab:
Click 'Edit' next to Authentication:
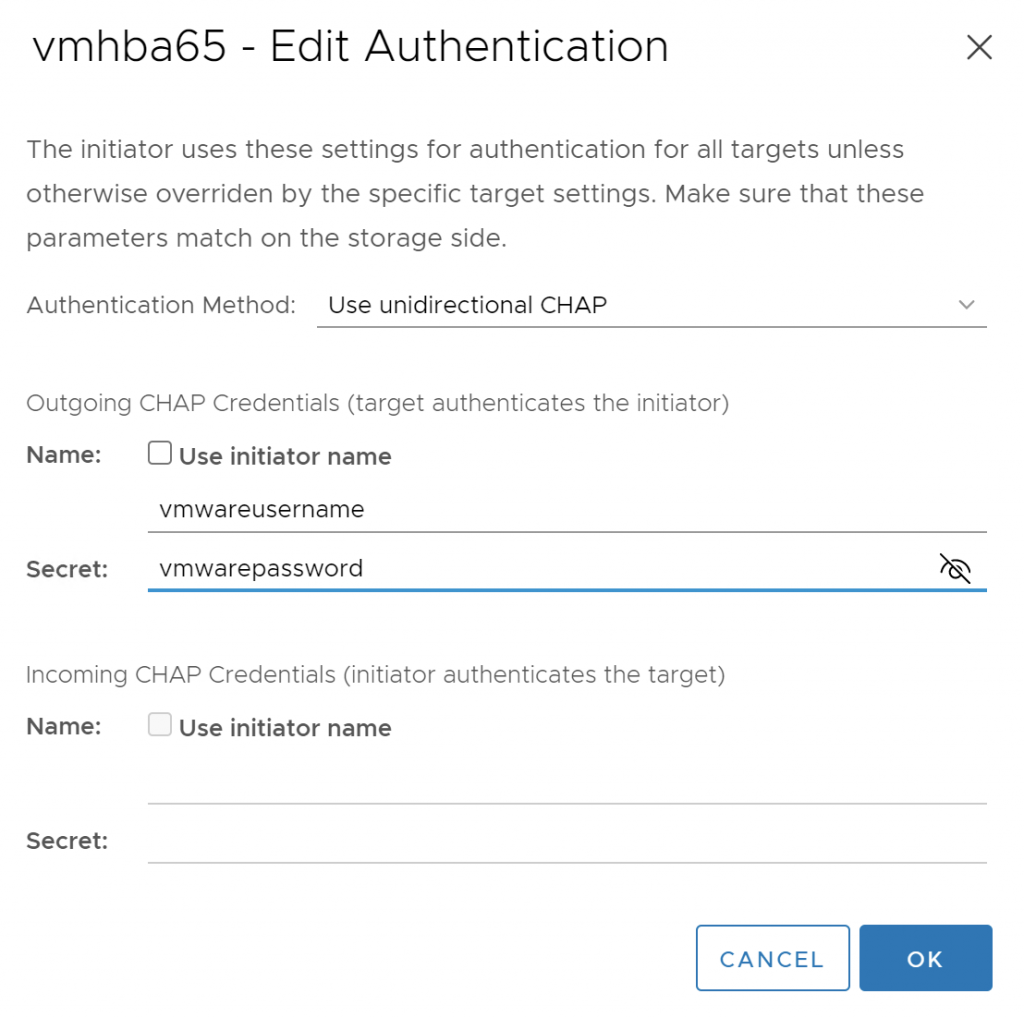
As we configured CHAP authentication on the iSCSI server, we need to enter the name and password we set before. Click OK to save it.
Now, move to the Dynamic Discovery tab and click 'Add', this box will appear:
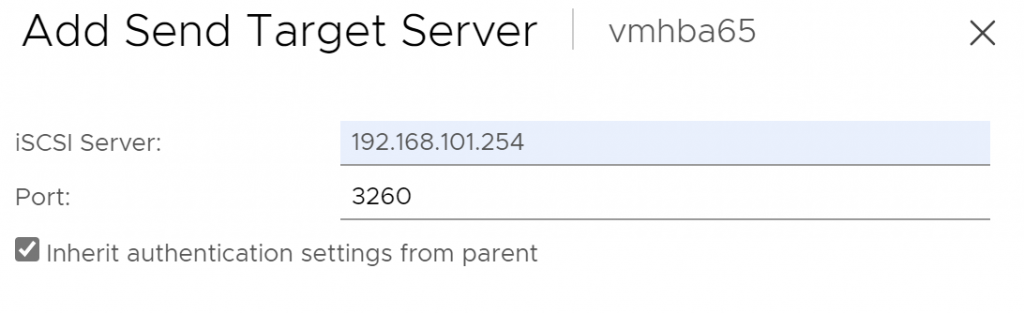
Here I have added the IP address of lab-san01's IP address on the ISCSI-A subnet. Click OK and then click 'Add' again. This time, add the IP address of lab-san01's in the ISCSI-B subnet (192.168.102.254) and click OK.
You should end up with it looking like this:

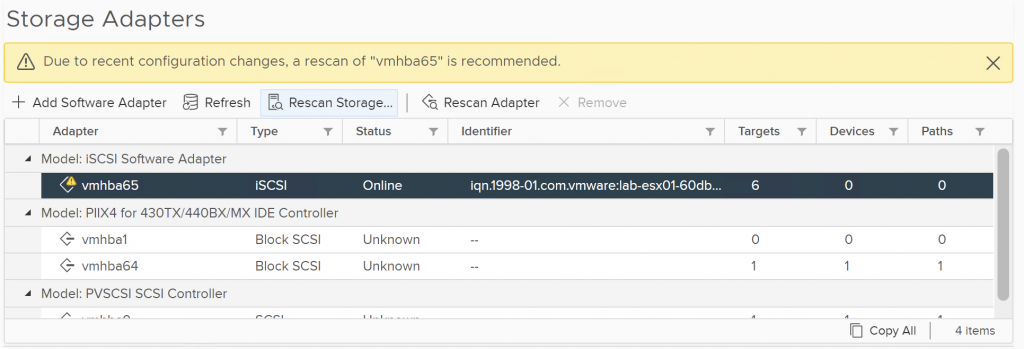
Now, we need to rescan the adapter to be able to see the storage, do this by ensuring the iSCSI adapter is selected and click 'Rescan Storage...':
This box will appear:
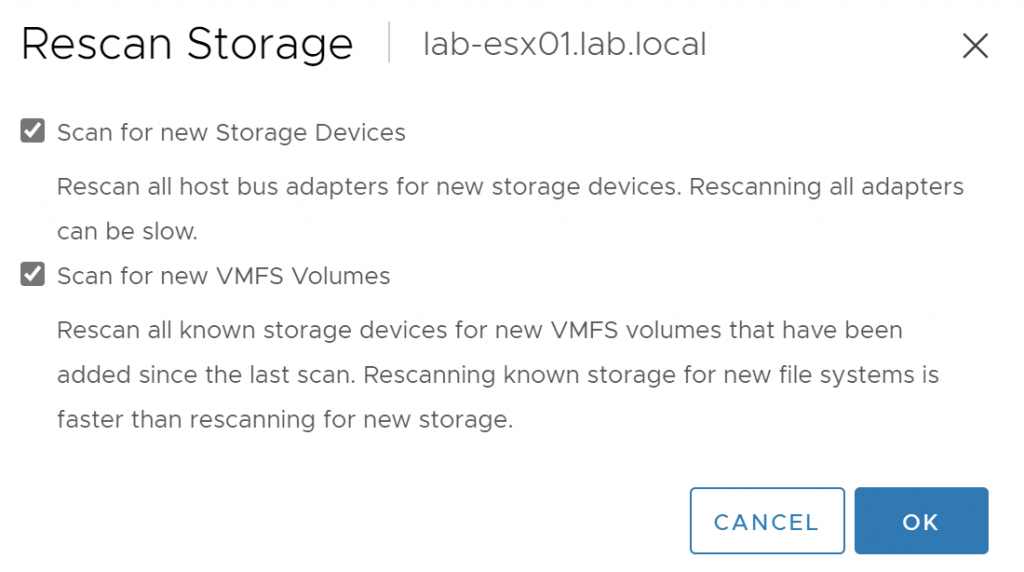
Ensure both options are ticked and press OK. The rescan should complete within a few seconds.
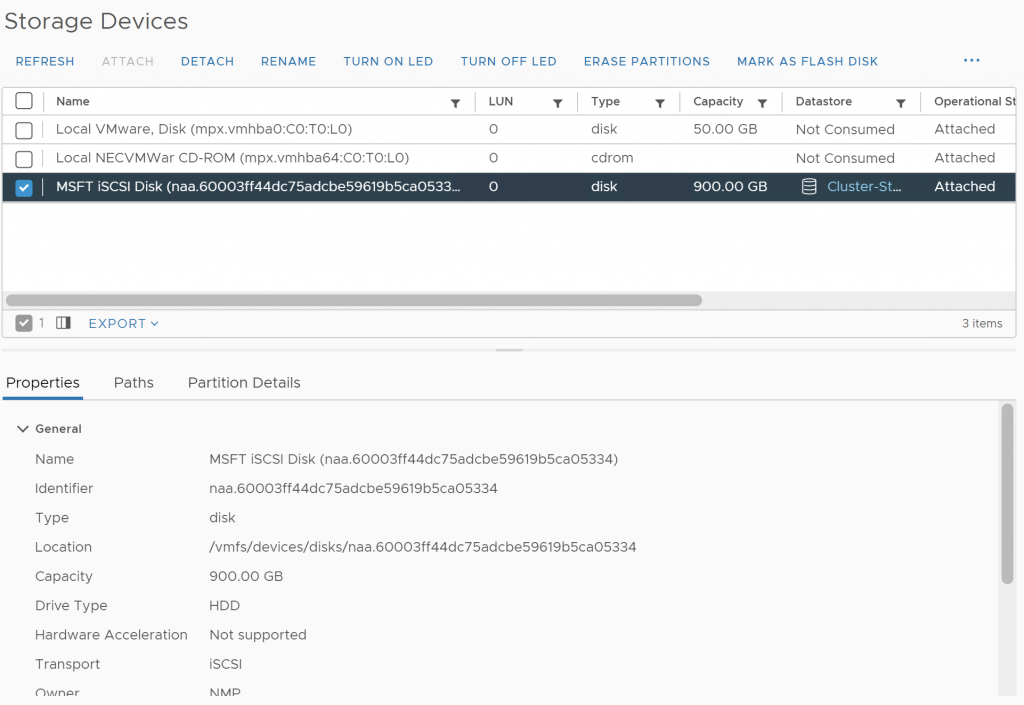
To see if the configuration has worked, move down to the 'Storage Devices' tab on the left hand side:
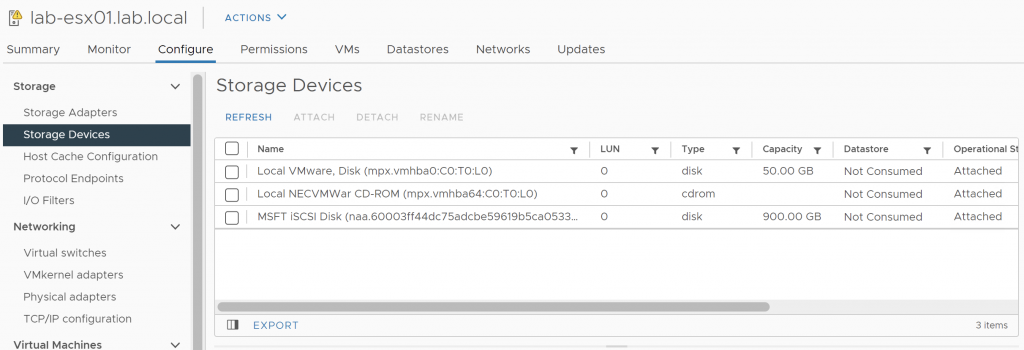
As you can see here, the bottom storage device is the iSCSI volume we configured on lab-san01.
Configuring a new Datastore from a Storage Device
Now we have the storage device added, it needs to be configured and added as a datastore.
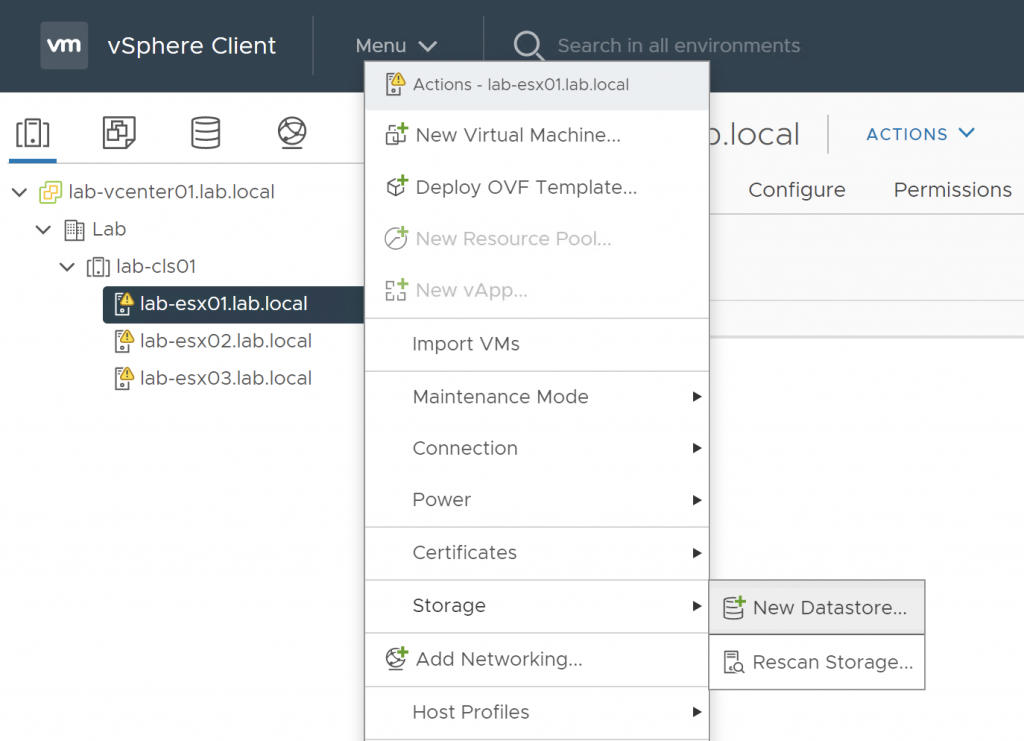
To do this, right click on the host, under storage, click New Datastore:
You should see this page appear:
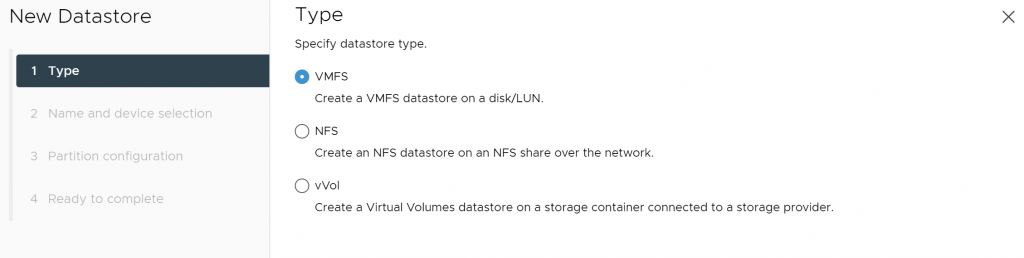
Ensure VMFS is selected.
Click Next.
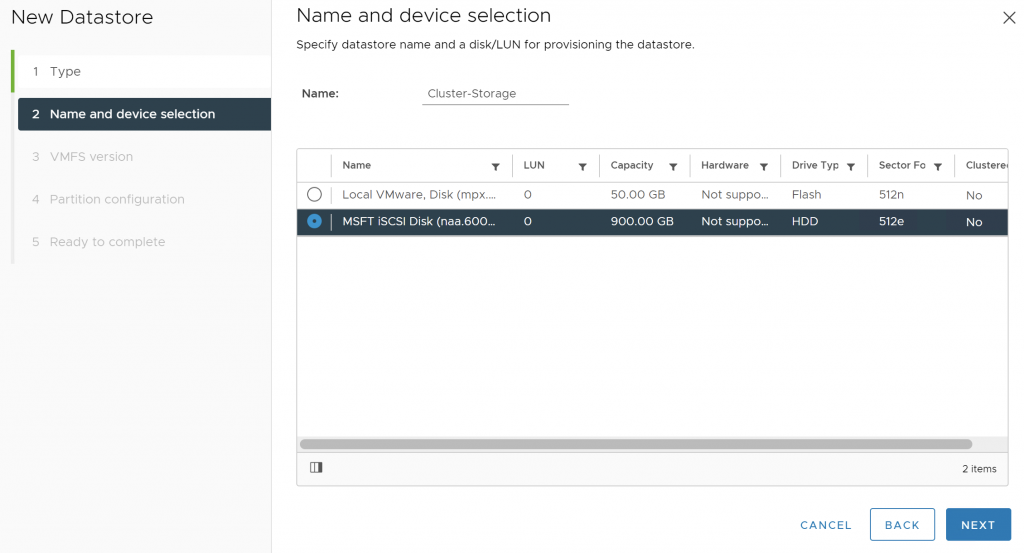
Here, I have given the Datastore the name 'Cluster-Storage' and selected the iSCSI storage device.
Click Next.
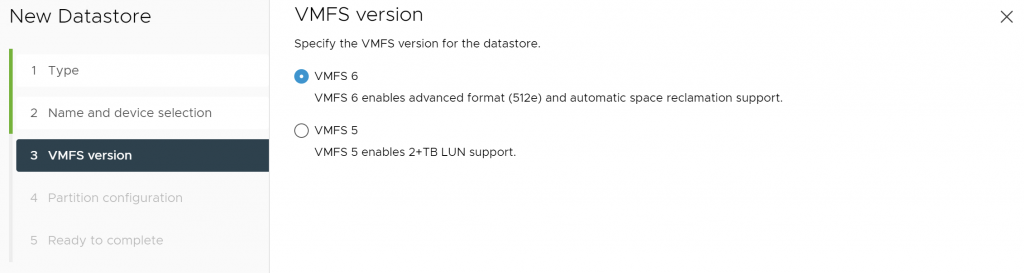
I have opted to use VMFS 6.
Click Next.
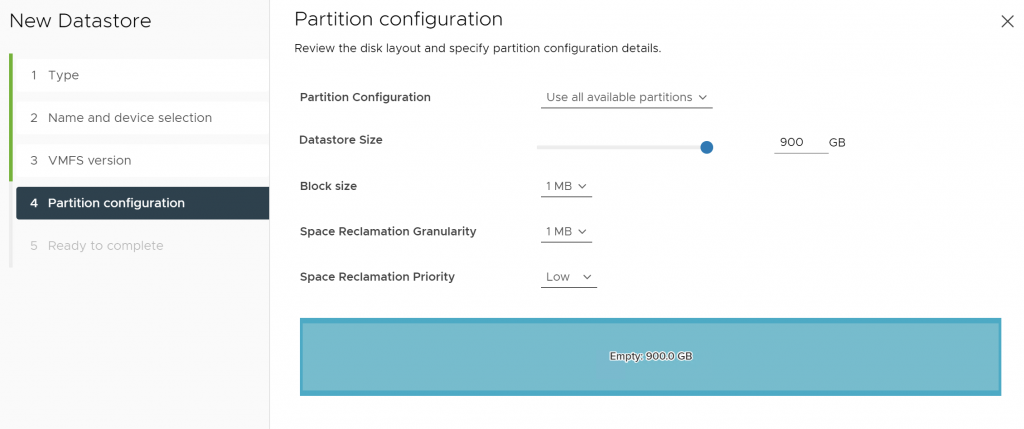
On Partition configuration, we will use the full disk. Ensure the Datastore Size is the full size of the disk.
Click Next to view the summary.
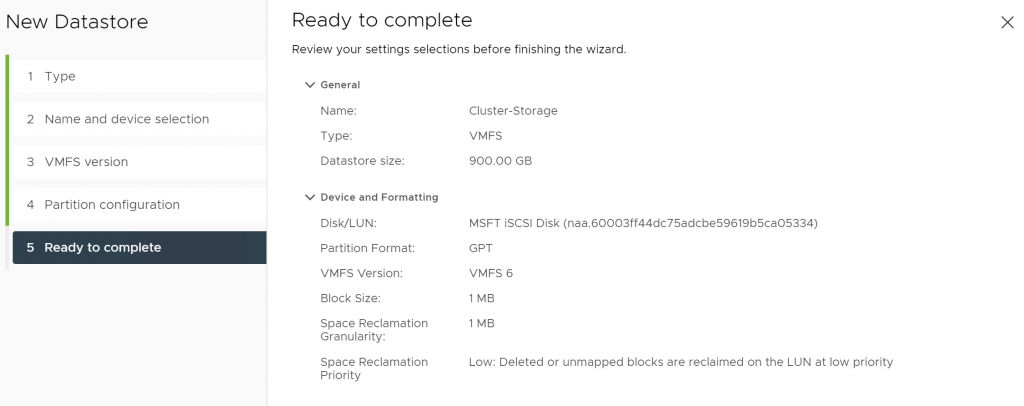
Looking at the summary, everything looks good, click Finish to create the Datastore.
It should appear under the Datastore tab for the host:

Now the Datastore has been created from the storage. Once host 2 and 3 are configured with the network settings and the storage adapter settings, the datastore should appear without having to add a new Datastore manually.
Now the first host has been configured, this needs to be replicated on the other two hosts, with the only changes being the IP addresses of the interfaces.
Once the datastores are configured, all the exclamation marks should disappear from the hosts:
Verifying Multi-path is working
As I opted to use an ISCSI-A and B. Multi-path should be working. To verify this, under a host, click on the Configure tab and then move down to the Storage Devices tab.
Click on the iSCSI storage device:
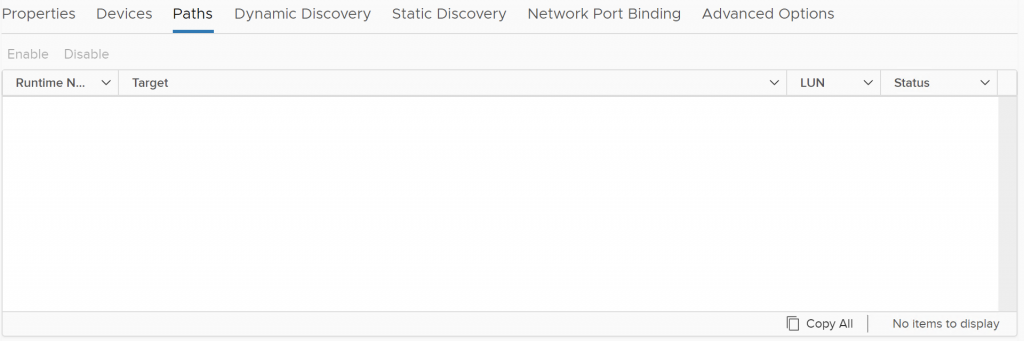
Move over to the Paths tab, you should see two paths to the storage:
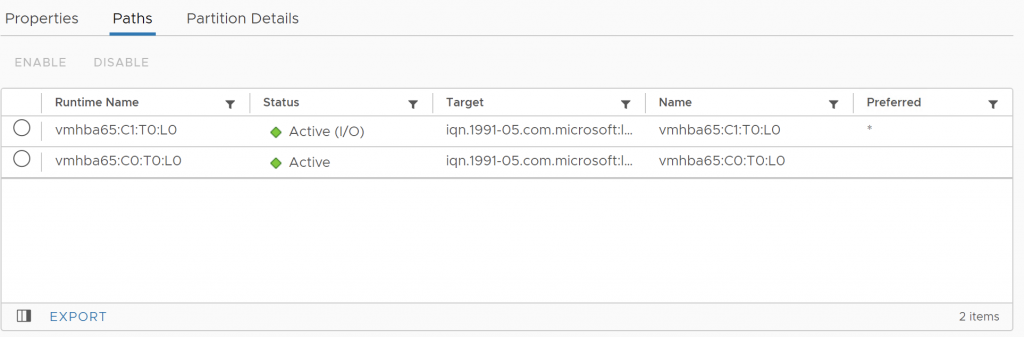
This looks good. Expanding the Target field will show that these are both the ISCSI adapters we configured:

As we see, one is 192.168.102.254 and the other is 192.168.101.254. This means that we can loose one the of the ISCSI links and the storage will stay attached. Lets try that!
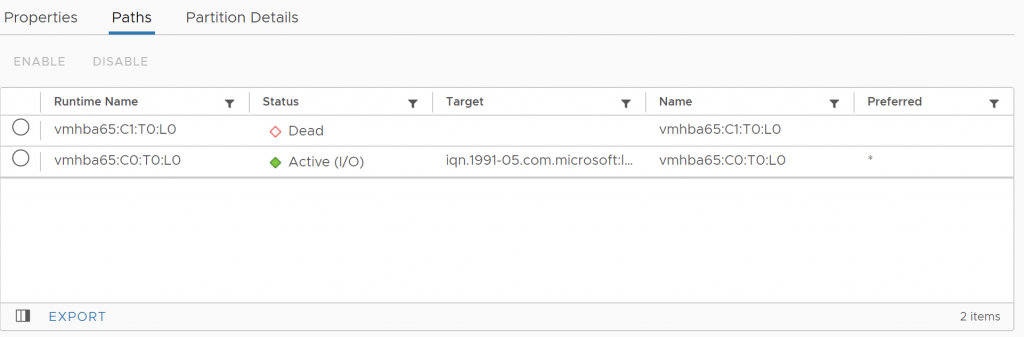
In VMware Workstation. I will disconnect the ISCSI-B connection that is currently in the 'Active (I/O)' state.
We can see that the ISCSI-A link has taken over:
Now we have the storage configured, in the next guide, we will create a VM on the cluster.

0 Comments