I this part, we will setup the 3 ESXi hosts.
Firstly, here is a photo of what the Virtual Network Adapters page looks like in VMware Workstation:

On the ESXi hosts, I have them configured as below:
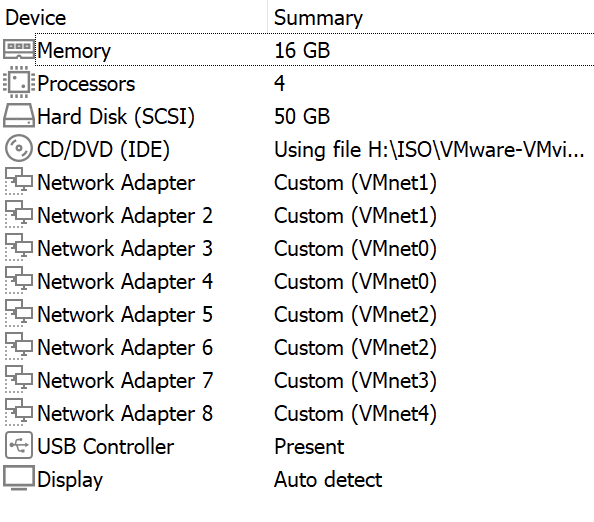
This is the same specification used across all 3 hosts.
Installing ESXi 7.0.0
Lets boot the first VM up!
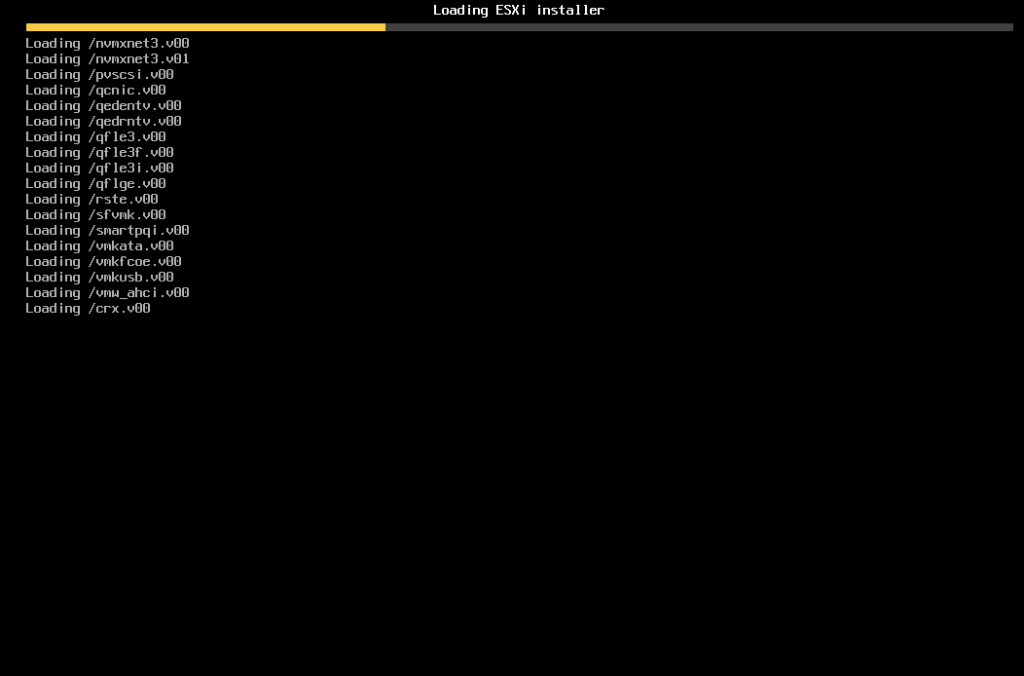
The VM should automatically boot from the ISO you attached:
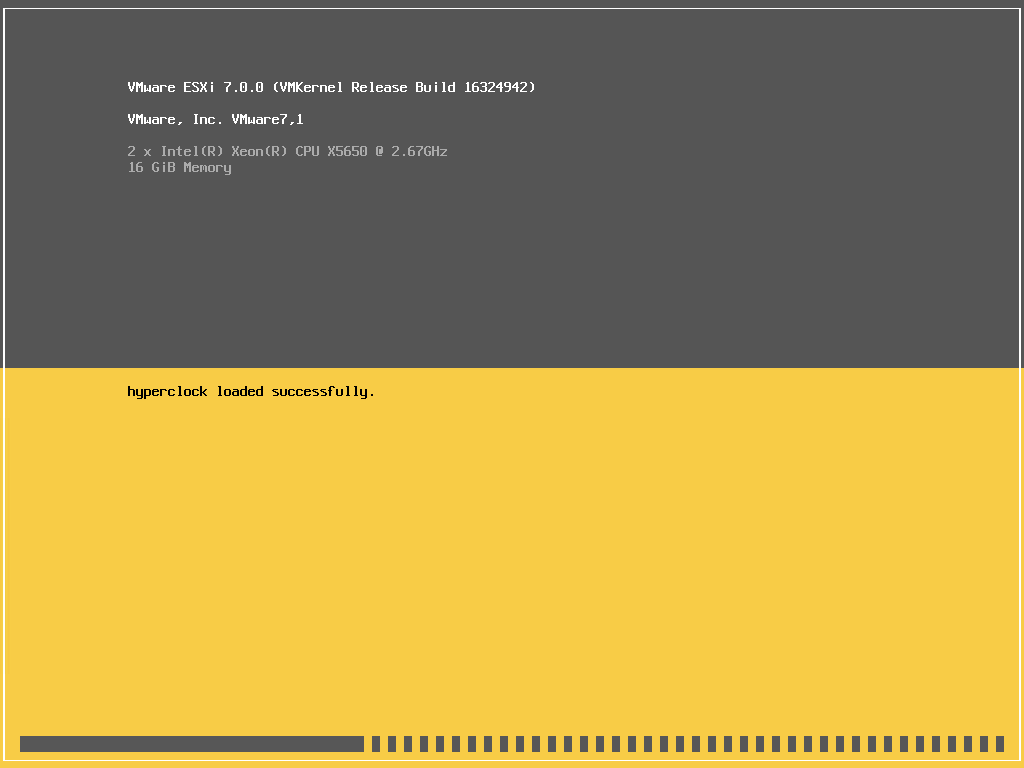
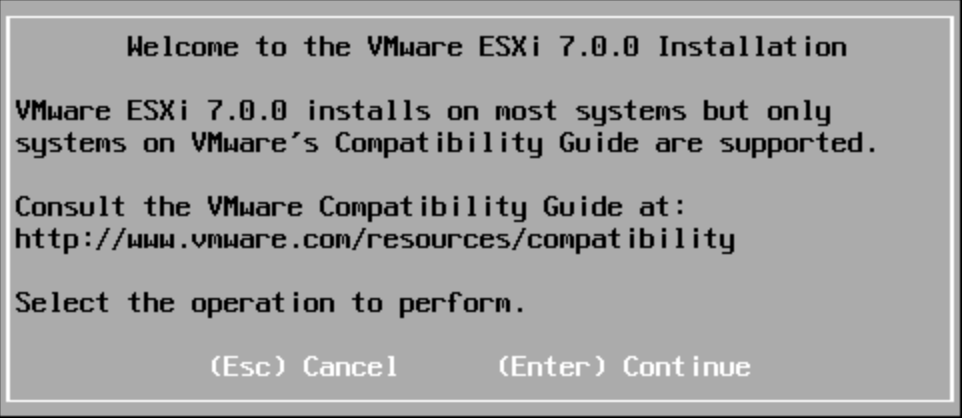
Once the installer has loaded, you can begin the setup by pressing 'Enter':
You will then be asked to press F11 to continue. The installer will search the system for disks that you can install ESXi on:
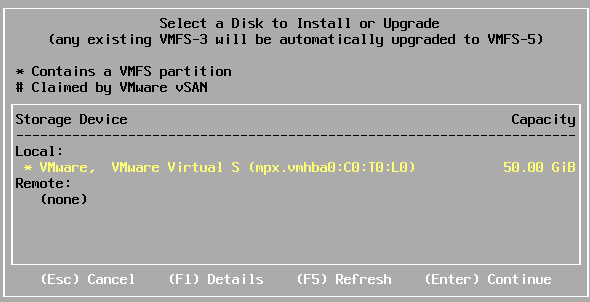
The VMware Hard Disk should appear in the list for you to select.
You will then be asked to select your keyboard layout.
The final prompt before installation will ask you to set the root password for the installer:
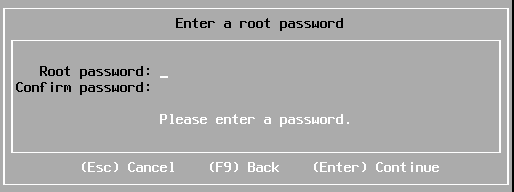
Once you have set the password, you may see some warnings, consult these before continuing as there may be issues with your hardware configuration.
If the system has detected that everything is good to go, you will see the 'Confirm Install' screen:
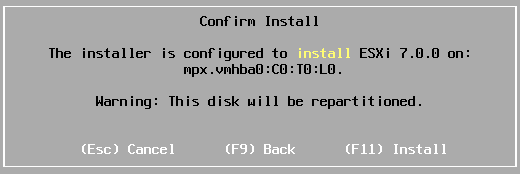
Press F11 and the installation will begin!
Once the installation has finished, you should see this message:
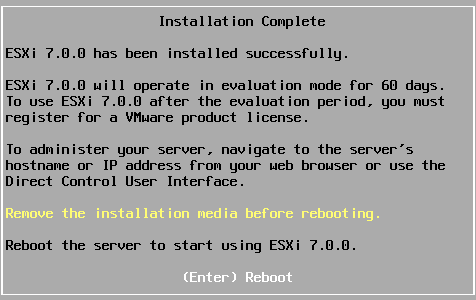
The system can now reboot and boot you into the main ESXi environment.
Configuring ESXi 7.0.0 with a base configuration
Once the installer has rebooted, you should find yourself at the main ESXi status screen:
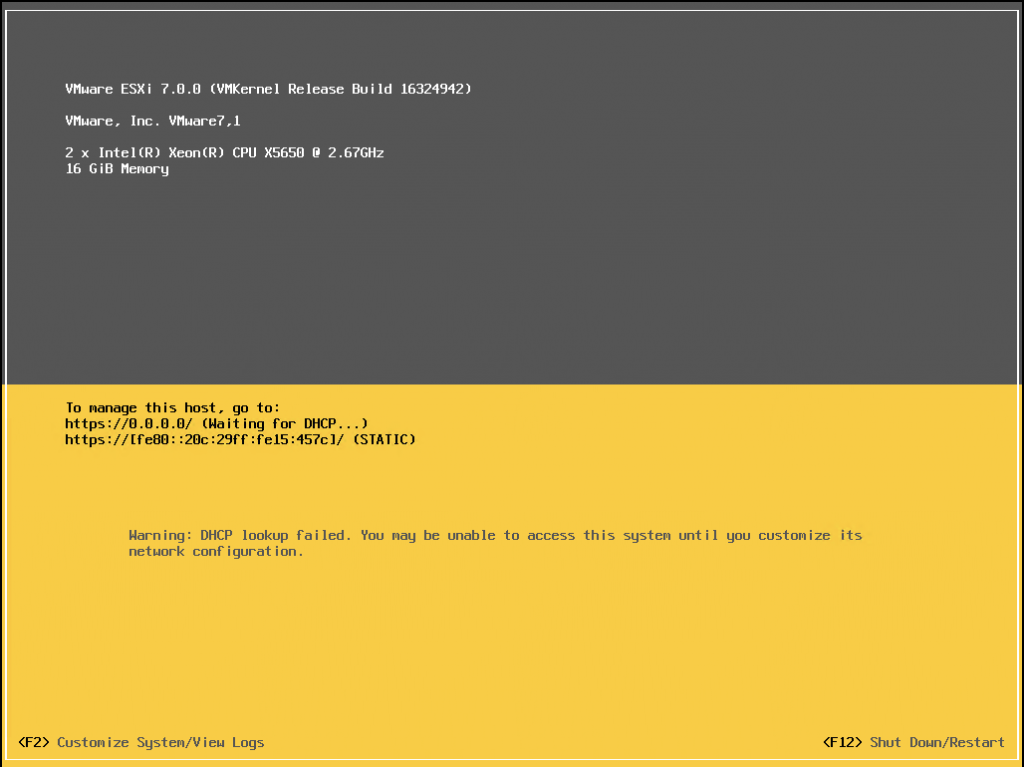
Once you see this main screen, press F2 to Customise the system. You will see a login screen before being able to get into the customisation screen. The username will be root and the password is what you set during the installer.
You should then see the following screen:
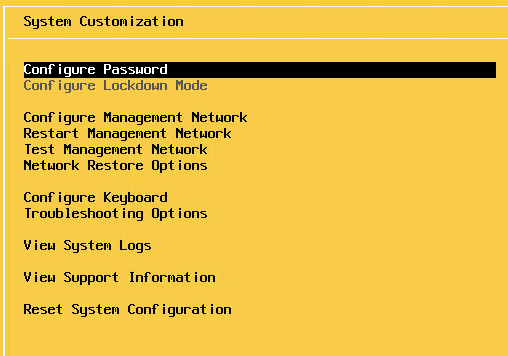
You need to use the keyboard to navigate down to 'Configure Management Network' and press Enter. You will get these options:
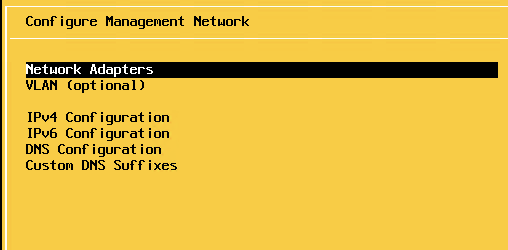
Select the 'Network Adapters' option. You will see a list of the Network Adapters presented to the VM:

From the initial configuration, we configured the top two interfaces to be in the Management network. To select the other adapter, use the keyboard to navigate down to it and press the space bar to select. An x should appear to the left of the device name to show it has been selected. In my case, both vmnic0 and vmnic1 should be selected.
Once you have the correct adapters selected. Press Enter to confirm your choice and take you back to the 'Configure Network Management' screen.
Next, you need to navigate down to 'IPv4 Configuration' and press Enter. You will get the below prompt:
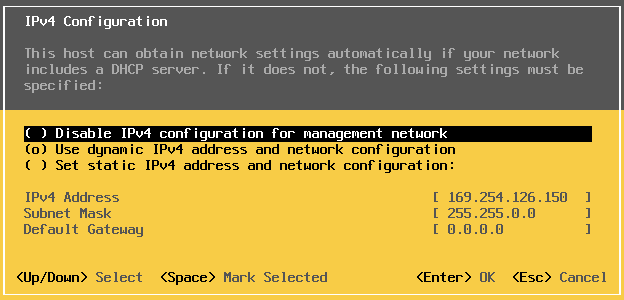
Unless you are running DHCP on your management network (which we aren't), you will need to navigate down to the bottom option for using a Static IP, pressing the space bar to select it. You will then be able to use the keyboard to navigate down to the IPv4 Address options below and set these for the host.
In my case for lab-esx01, this is my configuration:
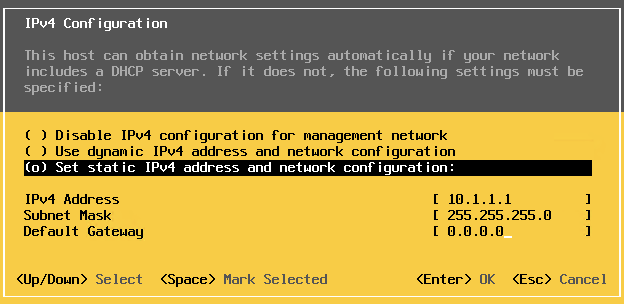
Once you have the desired configuration, press the enter key to save it.
This configuration wont actually become live until you restart the management network. Once you are back on the 'Configure Network Management' screen, press the esc key. You will see this alert appear:
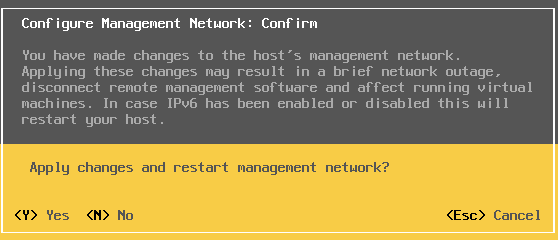
Press Y to apply the changes and restart the management network.
We can then prove this is working by pinging the management IP address from the host:
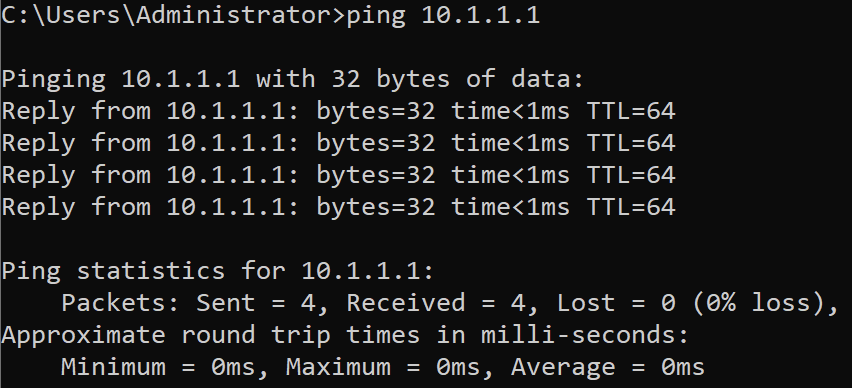
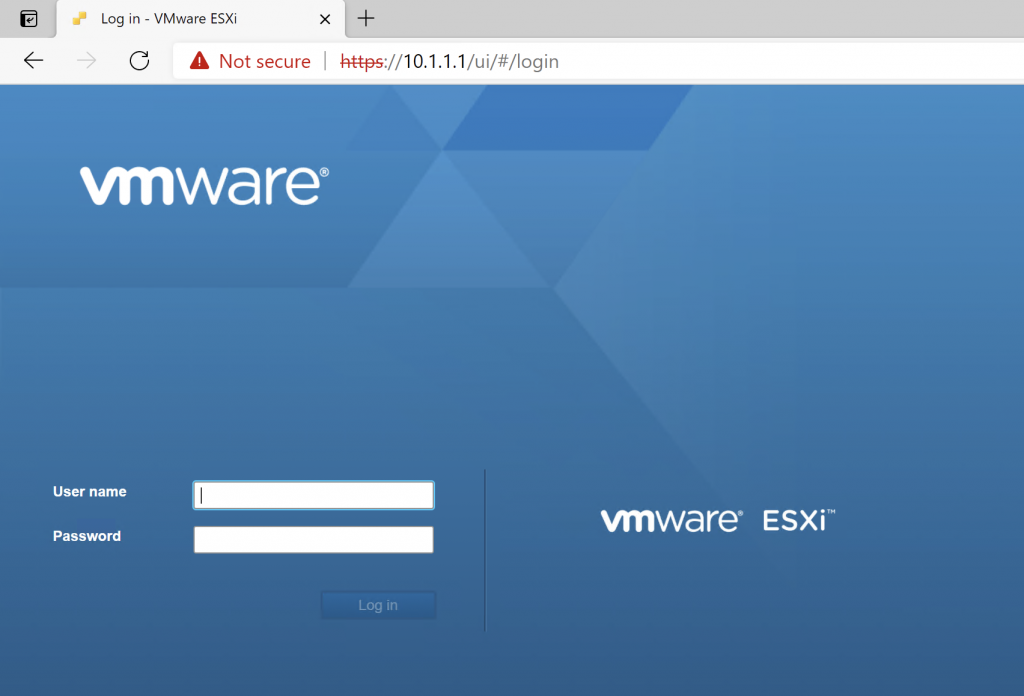
This is working as expected, and we should be able to access the web interface too:
We now have ESXi installed and configured on the first host. This process will need to be mirrored on the other two hosts (lab-esx02 and lab-esx03). With the only change being the management IP address on those hosts.
The management IP addresses in my environment will be:
- lab-esx01 - 10.1.1.1
- lab-esx02 - 10.1.1.2
- lab-esx03 - 10.1.1.3
- lab-vcenter01 - 10.1.1.251
- lab-san01 - 10.1.1.252
- lab-dc01 - 10.1.1.253
In the next guide, we will verify that all the ESXi hosts are running as we expect and then setup the relevant aspects of lab-dc01 to assist with the overall setup.

0 Comments